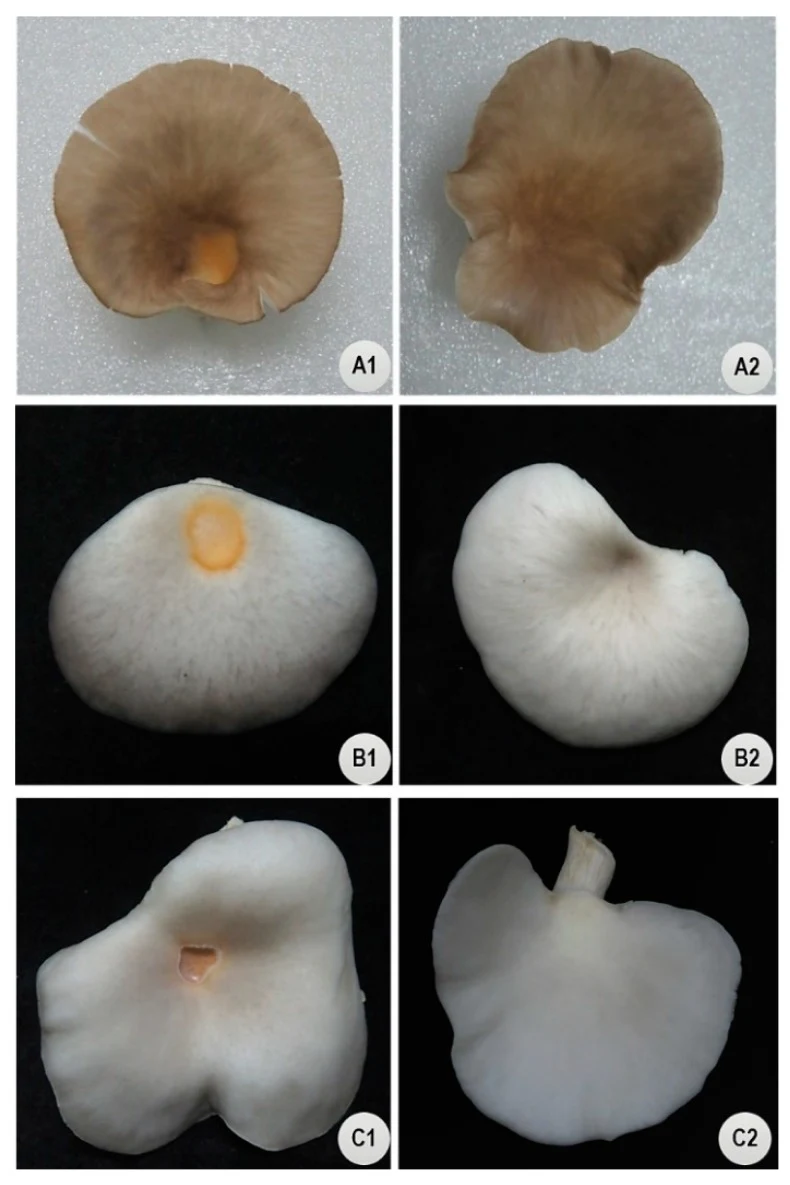
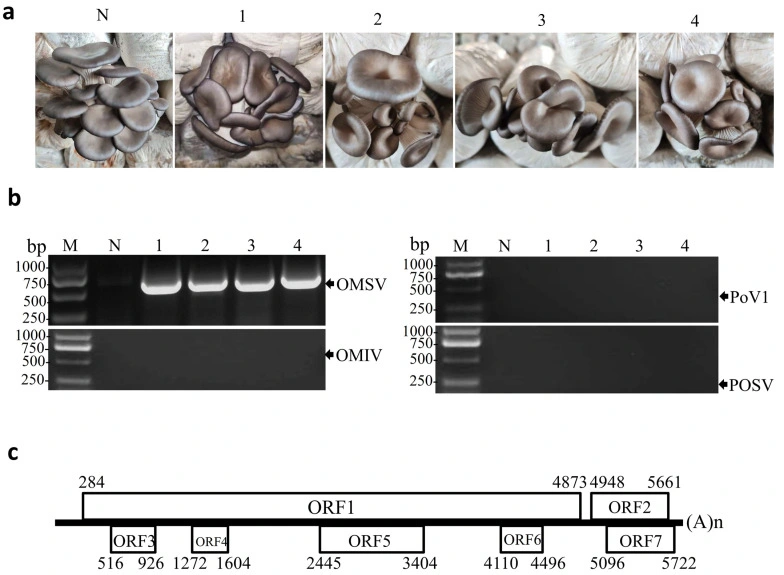
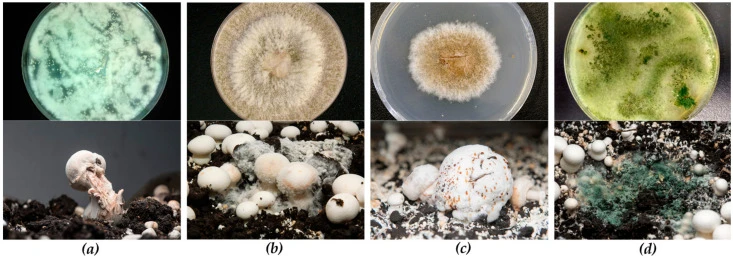
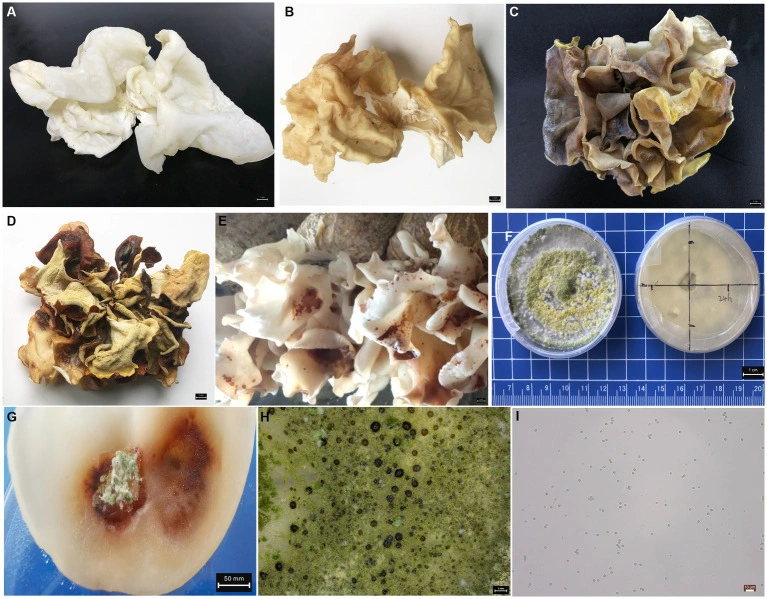
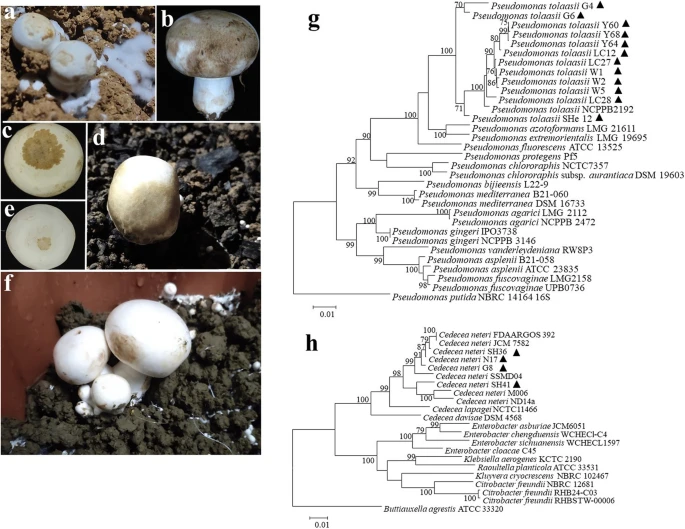
Real research photographs with attribution, host context and lookalike warnings. Generated teaching scenes are never presented as pathogen evidence.
Real symptoms, with the original context
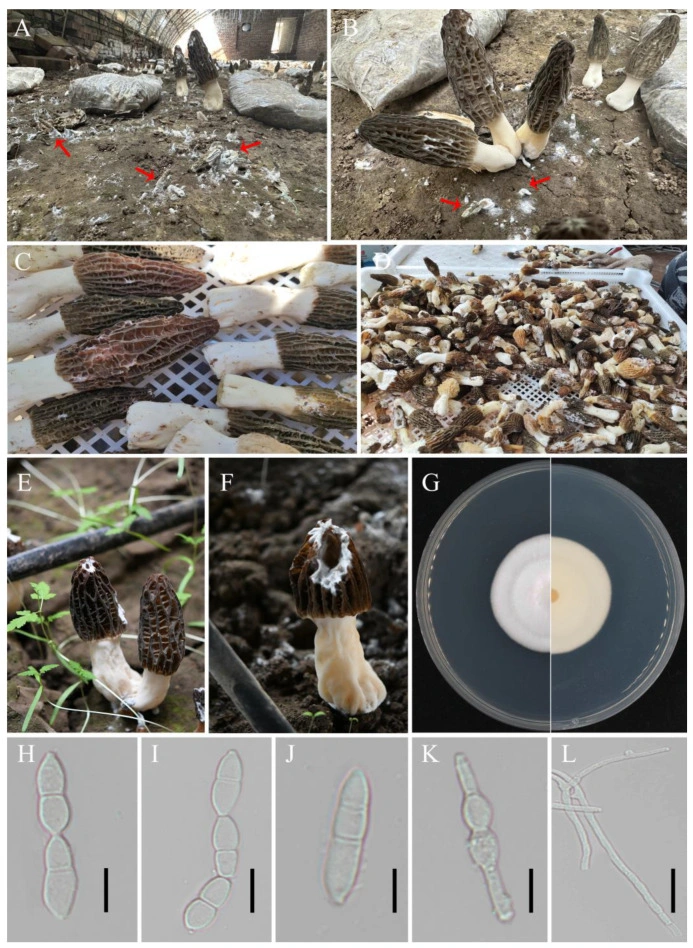
Compare structure, location and progression—not just colour. These images are from published research, not our farm cases. Some are experimentally induced symptoms. Captions identify that distinction. Tap a source to inspect its full figure and methods.
A green colony cannot distinguish all Trichoderma species from other green moulds.
A distorted mushroom cannot confirm a virus. Normal strain form and environmental conditions must be checked.
A normal-looking crop cannot rule out foodborne contamination.
Small organisms need identification: a mite or nematode may be harmful, neutral or beneficial.
Where a verified reusable image is unavailable, the condition page says so and links the research. We have not filled those gaps with synthetic pathogen photographs.
Illustrated field skills
Learn where to look—and what to record
These eight teaching plates explain anatomy, crop systems and observations. They are deliberately separate from the real research photographs above. Numbered details have readable explanations below each picture.
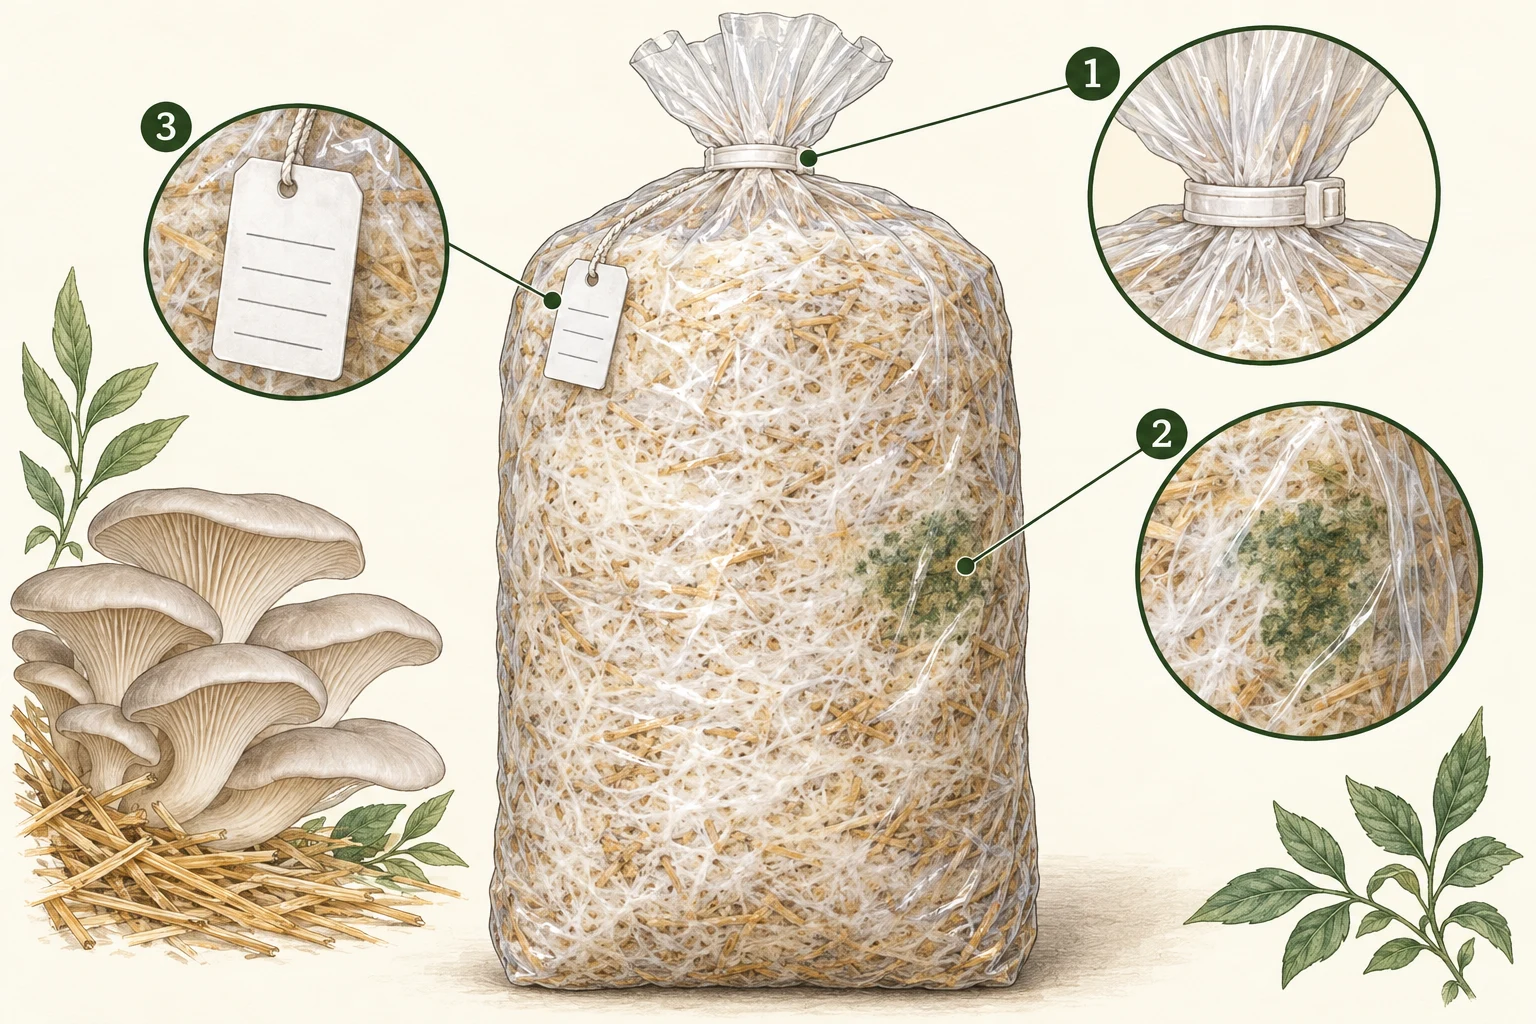
Read the bag before opening it
AI-generated teaching illustration · not a diagnostic photographAn illustrative contamination pattern, not a verified Trichoderma photograph. Inspect through the intact bag. The mushroom and leaf drawings identify the teaching context, not a recommended placement of crops beside contaminated material.
1
Closure and entry points
Record whether the first change is near a seal, filter, tear or fruiting cut. Do not open the bag to investigate.
2
Patch boundary
Photograph its position and change over time. A green patch does not identify a genus or species; early growth may be white.
3
Batch identity
Keep spawn lot, substrate treatment, inoculation date and rack position together. Compare other bags from the same batch.
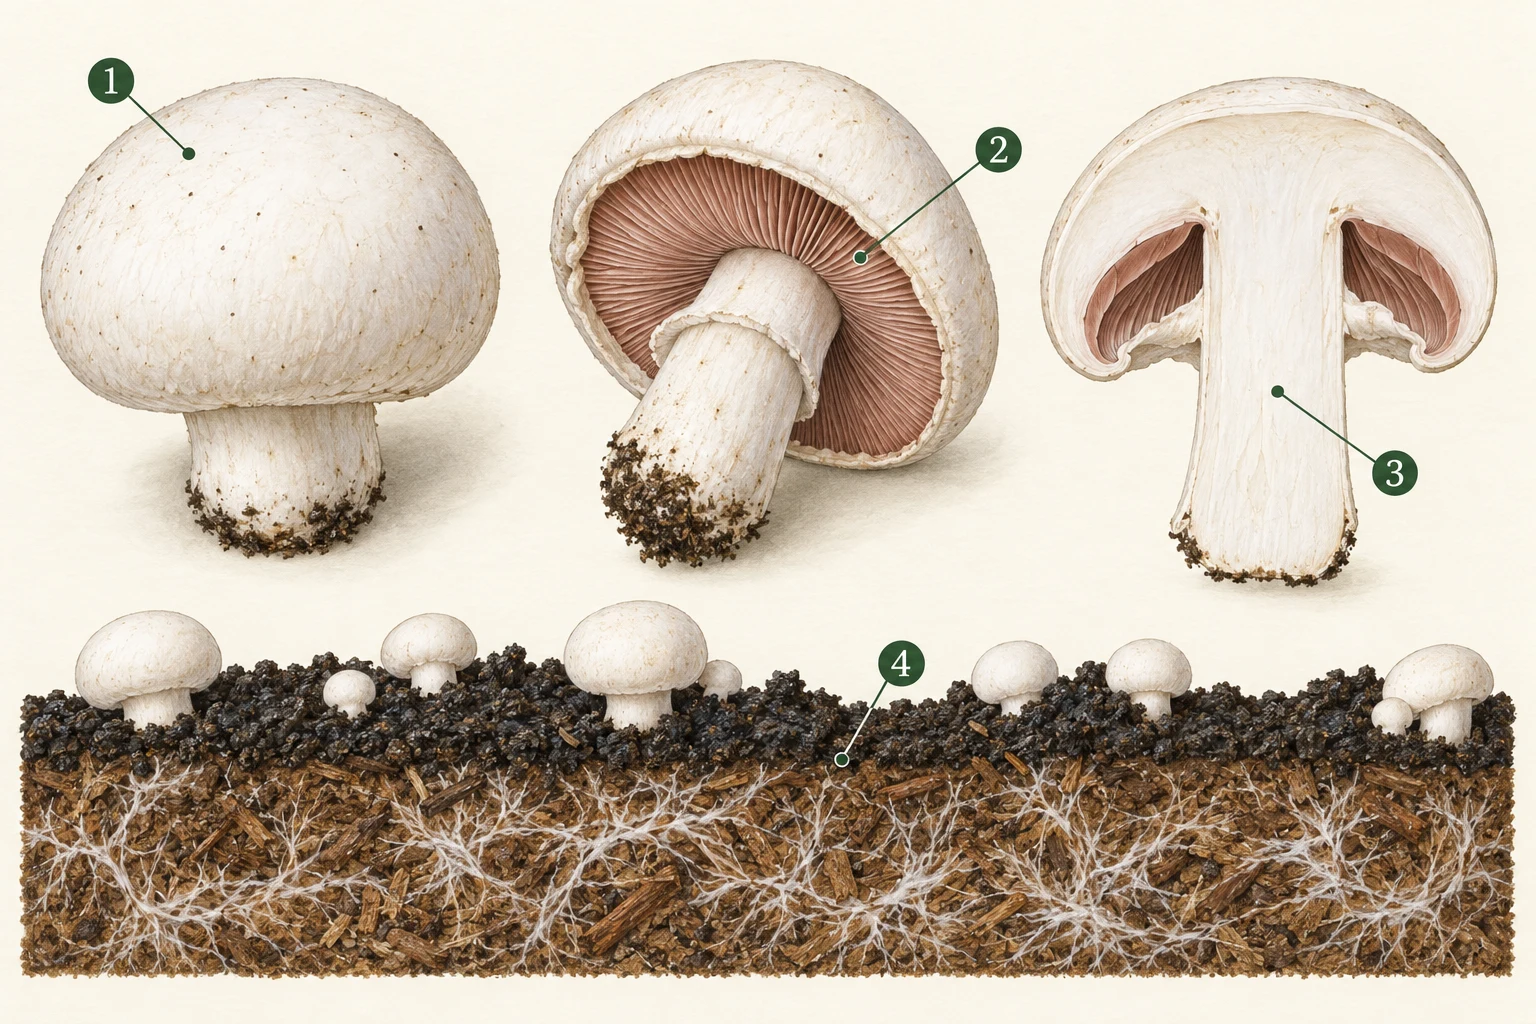
AI-generated teaching illustration · not a diagnostic photographA simplified Agaricus anatomy map, not a plate of diseased specimens. Gill colour changes with maturity. The cutaway explains location; it is not an instruction to cut suspect mushrooms in a crop room.
1
Cap surface
Record a local spot versus whole-cap colour, and whether it was present before picking.
2
Gills underneath
Separate normal maturity-related pigmentation from unusual wetness, exudate or deterioration.
3
Inside the stem
Internal changes can differ from the outside. Obtain sampling instructions before cutting suspect material.
4
Casing and compost
Note whether the change starts in the fruit body, the casing surface or the substrate below.
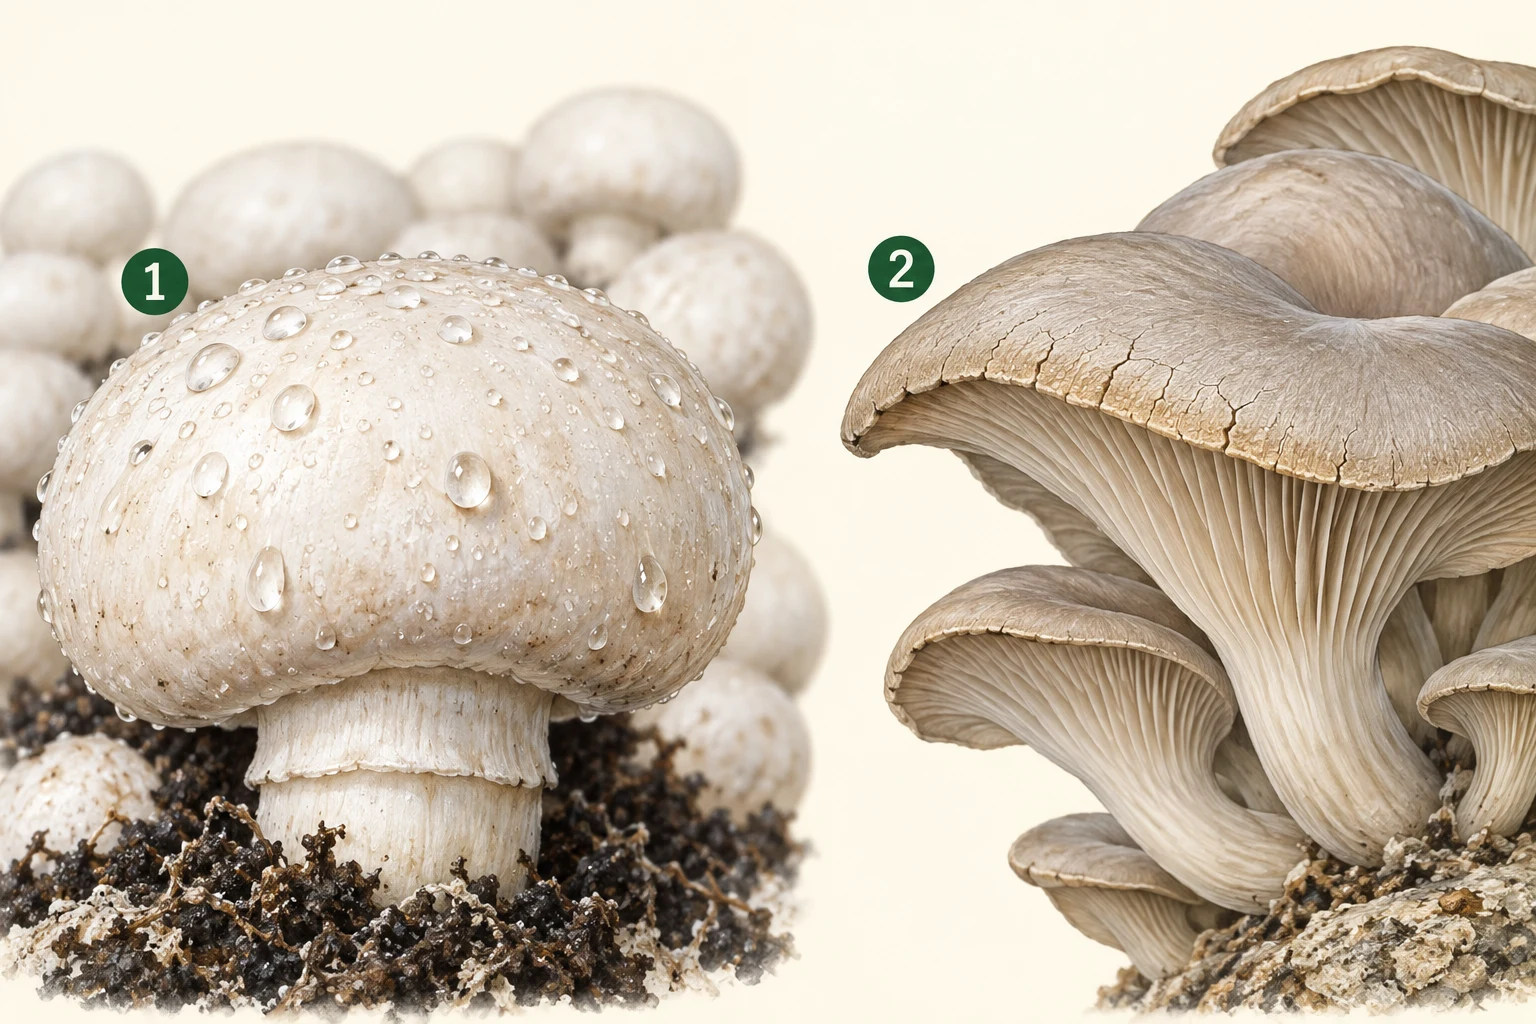
AI-generated teaching illustration · not a diagnostic photographTwo different crops illustrate moisture observations—not healthy versus diseased controls. Neither droplets nor cracks establish an infectious cause.
1
Surface water
Record watering time, condensation and how long caps remain wet. Room relative humidity alone does not describe cap wetness.
2
Drying and cracking
Check where damage occurs and when it appeared. Compare airflow, water supply and maturity with a same-strain crop.
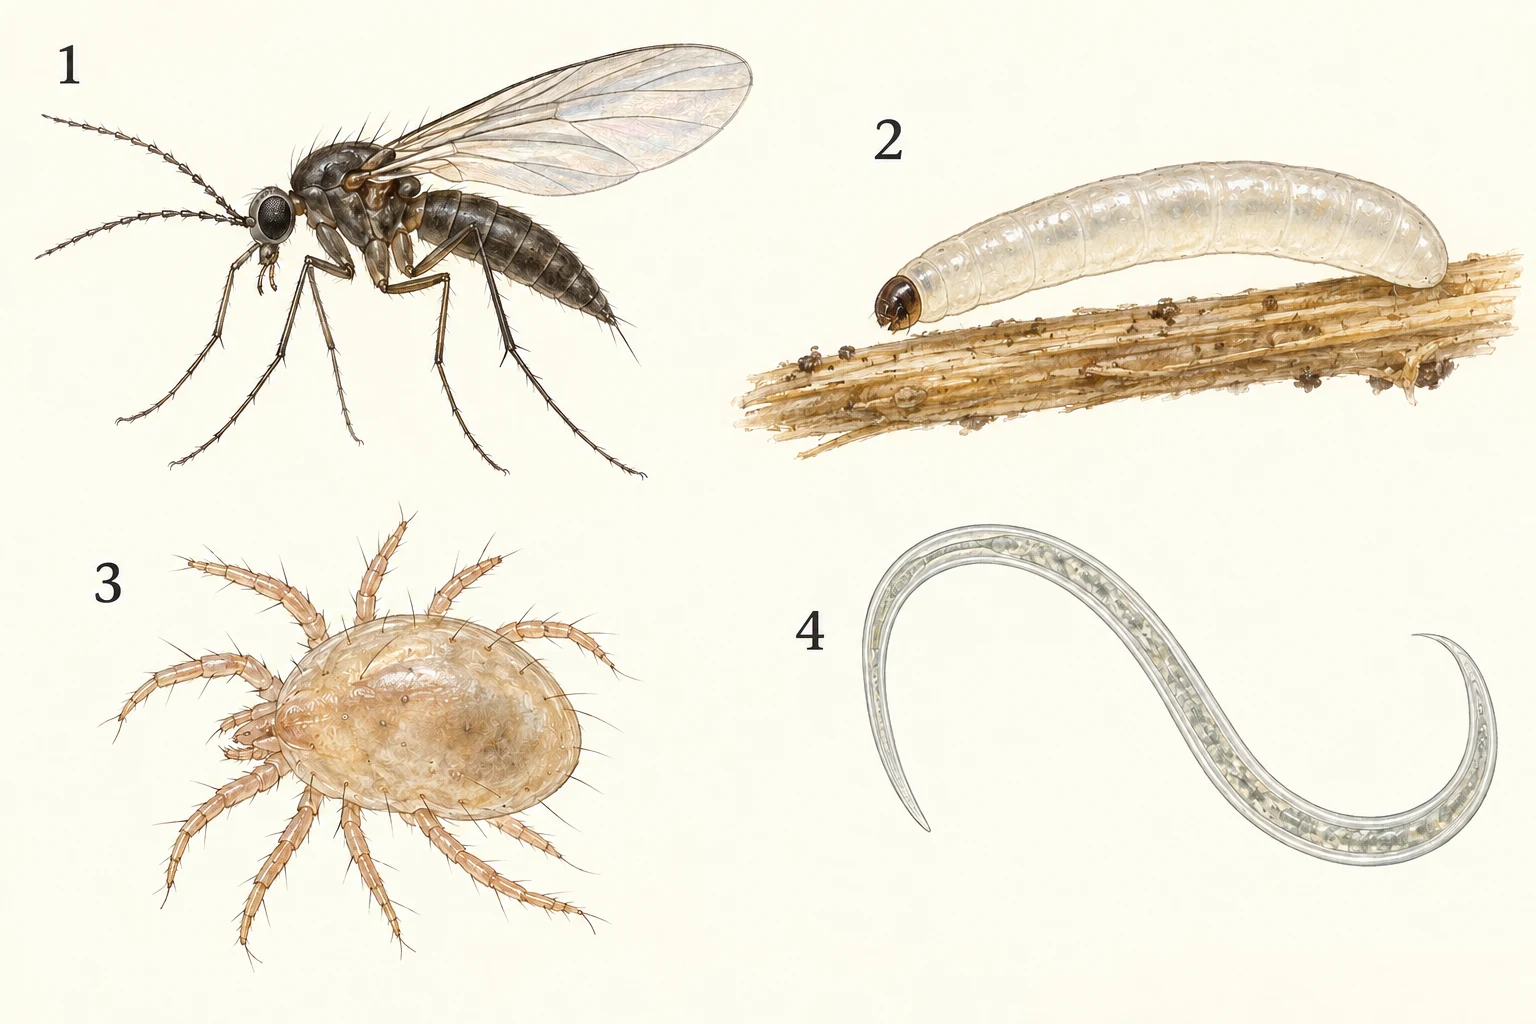
AI-generated teaching illustration · not a diagnostic photographConceptual forms, not a species-identification key or a shared magnification. This plate does not depict every fly family, springtails or outdoor pests. Harmful and beneficial organisms can look similar.
1
An adult fly
Record where it is seen and whether it walks, runs or flies. Adult identification and larval damage are separate observations.
2
A larval stage
A gnat-like legless larva is shown. Do not assume that every pale organism in substrate is the same pest.
3
A mite
Mites may feed on crop tissue, mould or other organisms. Presence alone is not proof of crop damage.
4
A nematode-like form
Nematode groups have different roles. Microscopic examination and specialist identification may be necessary.
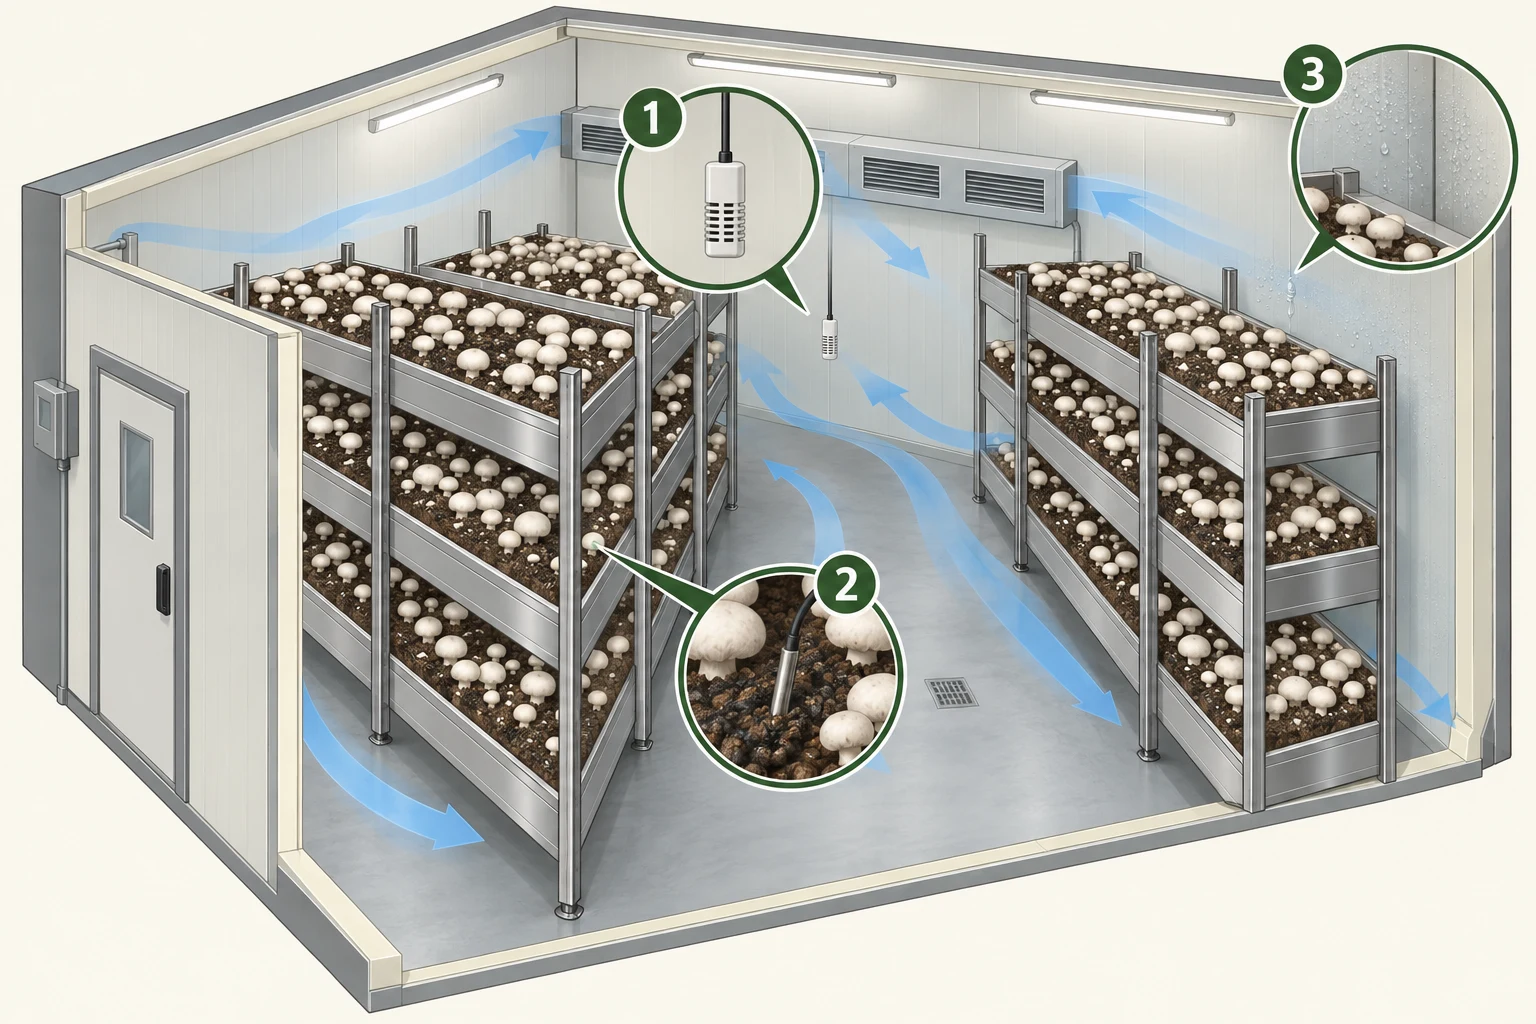
AI-generated teaching illustration · not a diagnostic photographA conceptual cutaway—not an engineered airflow plan, sensor-placement specification or setpoint recommendation. Button racks illustrate observation locations; other crop systems need their own arrangement.
1
Room air
Use time-stamped readings at representative positions. One sensor can miss a rack-level or doorway difference.
2
Substrate
Record substrate temperature separately from room air using the farm’s appropriate hygienic measurement procedure.
3
Cold or wet surfaces
Map condensation, leaks and wet crop zones. Compare the pattern with watering and temperature changes.
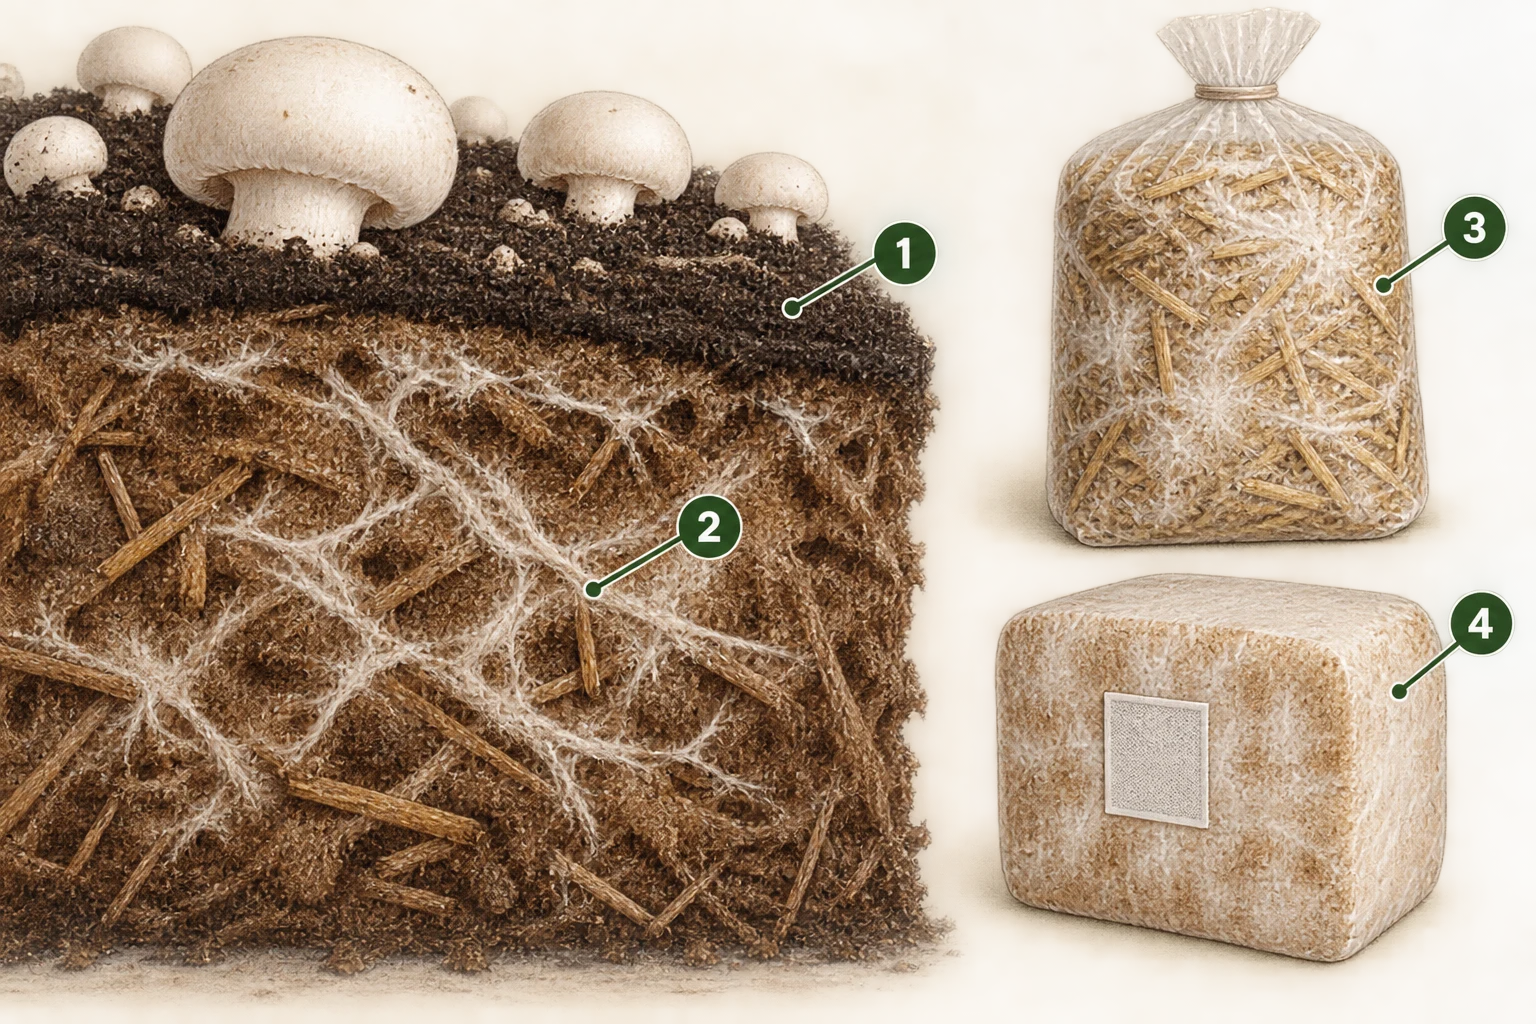
AI-generated teaching illustration · not a diagnostic photographA location map, not a substrate recipe, preparation protocol or guarantee of healthy material. Composted, pasteurised and sterilised systems are not interchangeable.
1
Casing layer
For crops that use casing, trace storage, handling and the casing lot separately from the compost.
2
Compost below
Compare the compost lot and preparation history. White growth is not, by itself, proof of either purity or contamination.
3
Straw bag
Record treatment, cooling, spawning and the first affected position through the intact bag.
4
Wood-substrate block
Check the filter, seal and batch history without opening suspect material. Normal block appearance depends on crop and stage.
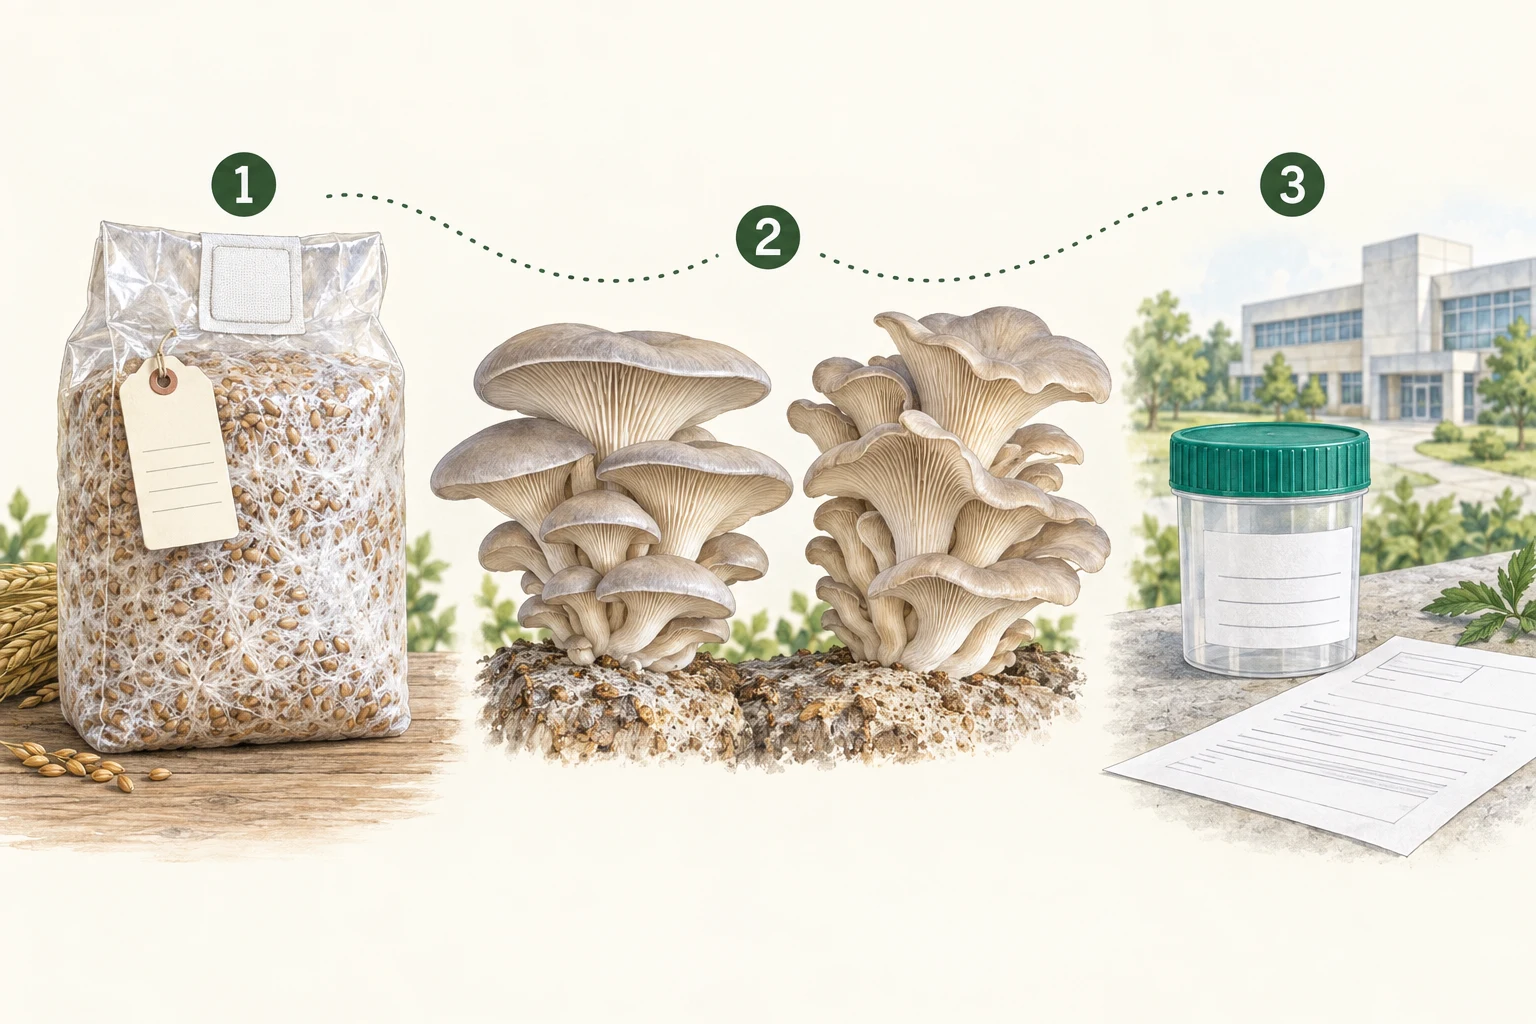
AI-generated teaching illustration · not a diagnostic photographDifferent cluster shapes are not a virus test or proof of degeneration. The generic container and laboratory are symbols, not a sample-packing specification or an institutional endorsement.
1
Trace the culture
Keep the supplier, species, strain, spawn lot, receipt date and storage history.
2
Compare like with like
Compare the same strain and stage under recorded conditions. Natural strain variation can resemble a disorder.
3
Ask before sampling
Contact a qualified laboratory about the diagnostic question, accepted material and shipping instructions.
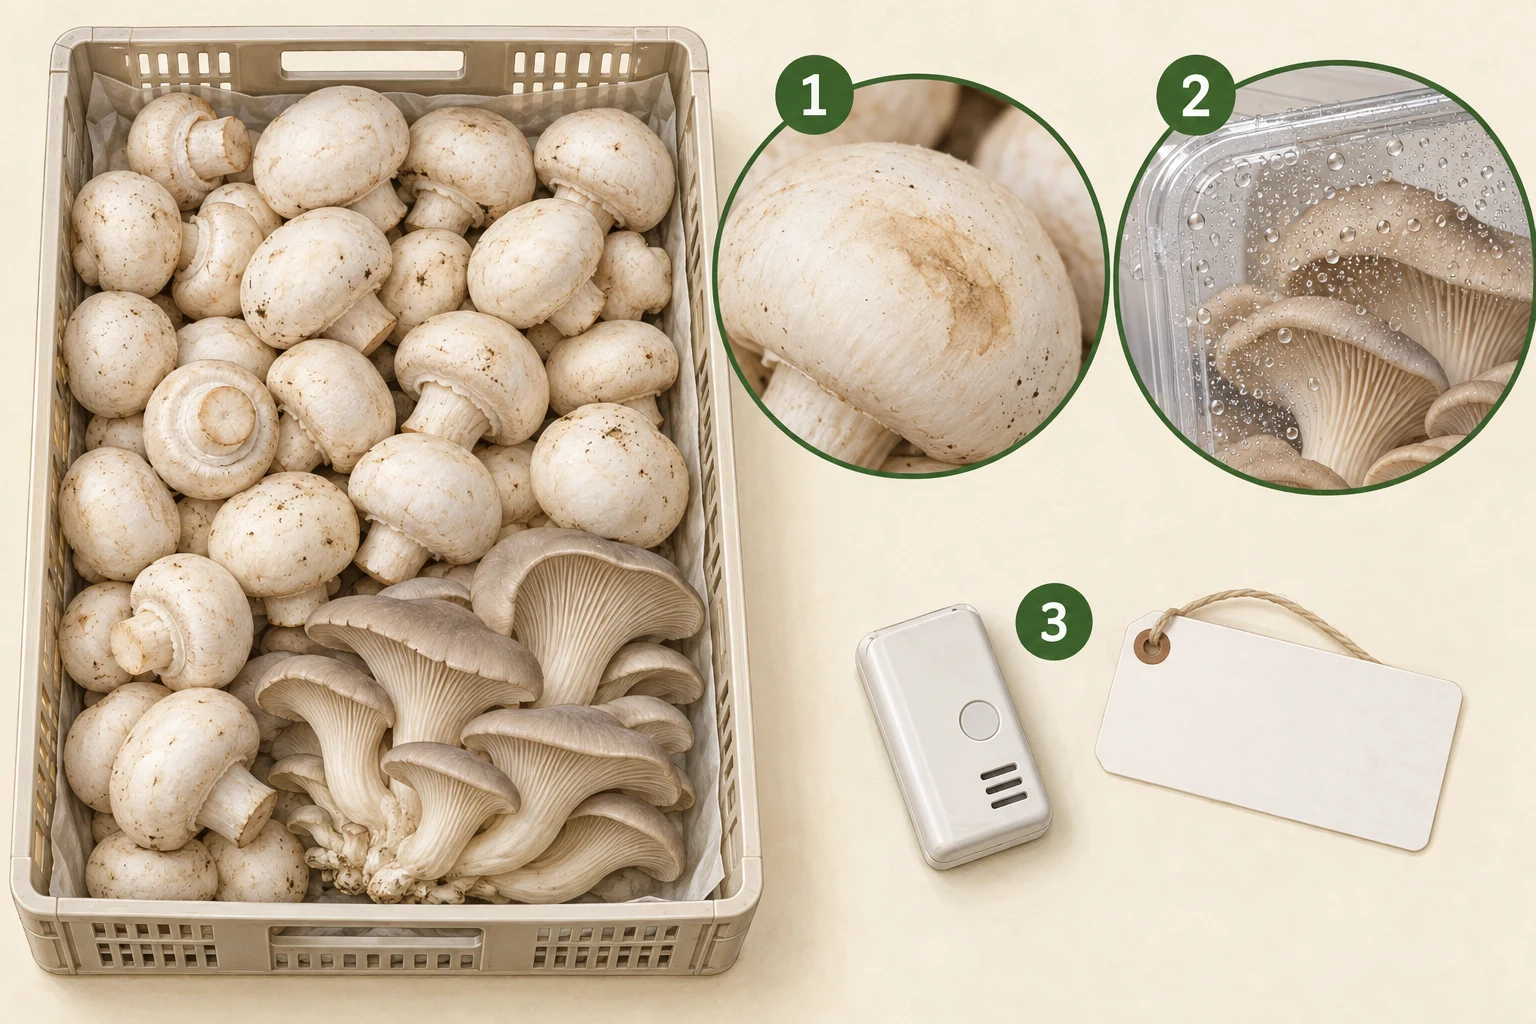
AI-generated teaching illustration · not a diagnostic photographA teaching still life, not a recommended mixed-crop packing arrangement or food-safety clearance. Invisible contamination cannot be ruled out by an attractive appearance.
1
Bruising or colour change
Ask whether it appeared before picking, during handling or in storage. A brown area is not automatically bacterial blotch.
2
Moisture inside a pack
Record condensation, temperature changes and elapsed time. Do not use a visual match to release a suspect lot.
3
Time, temperature and lot
Link harvest, packing and transport records so affected produce can be traced and assessed.
Eight numbered observation plates and three workflow scenes explain anatomy, growing systems, moisture, pests, culture history, harvest handling, recording and separation of work areas. They do not establish a pathogen, identify every organism or prove that a building meets biosecurity requirements. A generated grower is not a real scientist or an institutional endorsement.
 MushroomFarming.in
 ICAR–DMRSolan