

A practical guide to growing mushrooms in IndiaA joint educational initiative by MushroomWale & DMR Solan
MushroomFarming.in

A joint educational initiative by

MushroomWale.com
ICAR–Directorate of Mushroom Research, Solan logoICAR–DMRSolan

MushroomFarming / guide

Mushroom Crop Health

An evidence-led guide to connect symptoms to biology, compost, casing, climate, pests, hygiene and engineering through evidence.

4 full chapters + technical referenceSources & review ↓
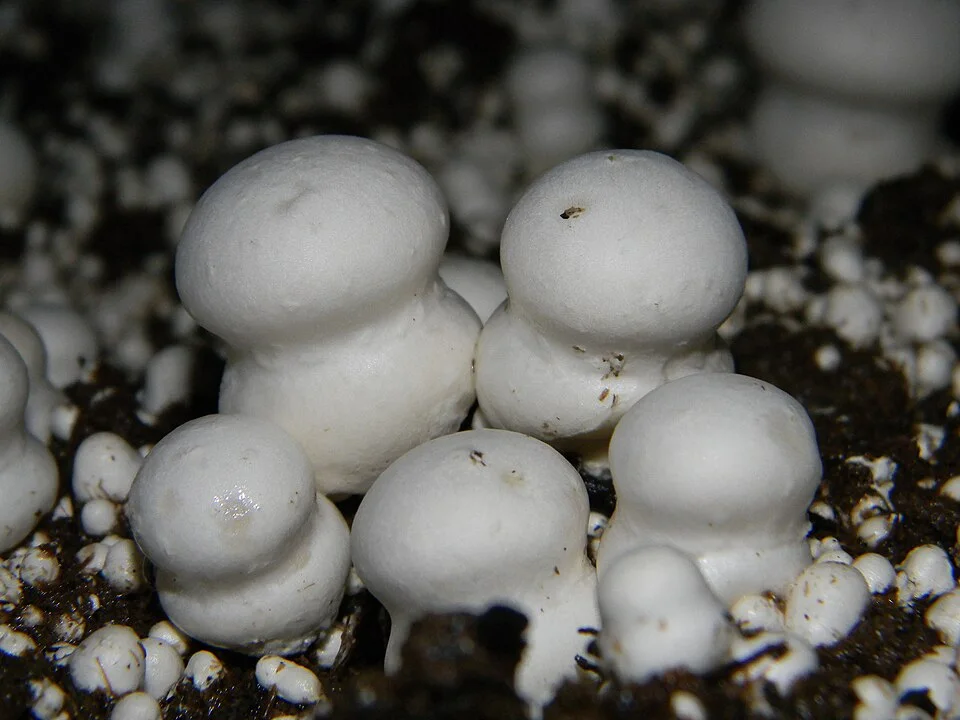
Real close photograph of white Button Mushrooms growing on a dark casing surface.
Cultivation context—not a diagnostic photograph. See the labelled symptom references below.I. G. Safonov (IGSafonov) · CC BY-SA 3.0View full photograph ↗
On this pageChoose a section, or keep reading below

New to this topic? Begin here.

A symptom is the beginning of an investigation

First describe what changed, then compare possible explanations. A spot, stalled bag or uneven bed is not a diagnosis. This lesson shows how to turn a worrying observation into a useful question for your adviser without treating a look-alike picture as proof.

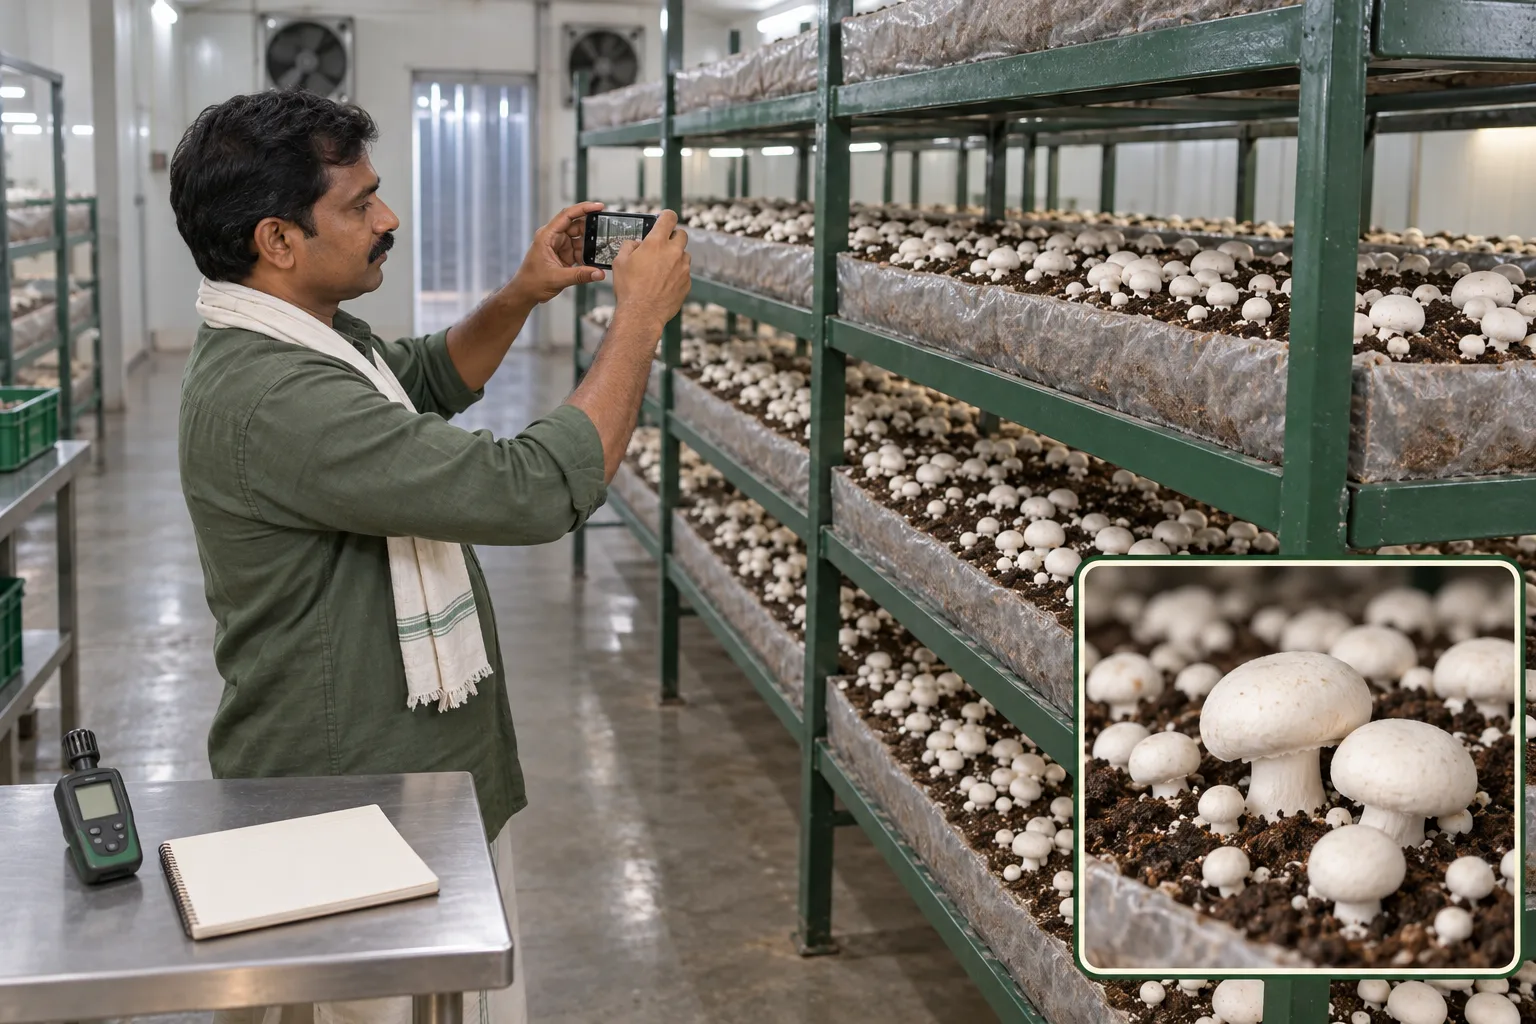
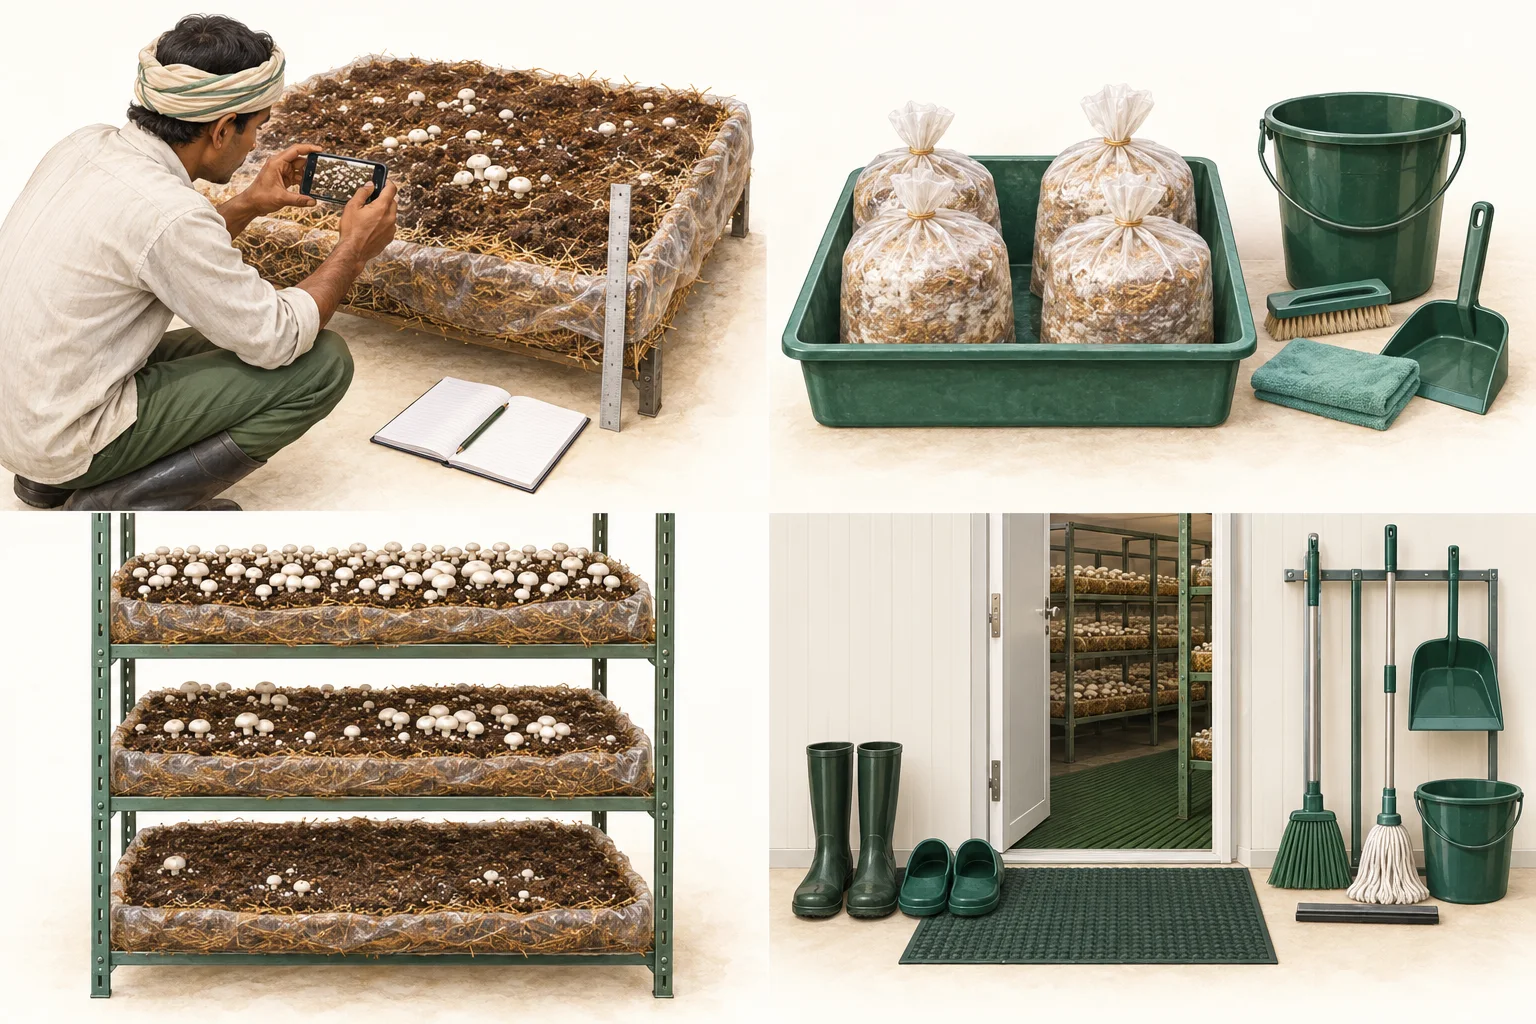
Teaching illustration of a grower documenting a mushroom bed with photographs, a notebook and measurements.
AI-generated documentation scene, not a disease reference. Actual published disease photographs remain in the crop-problem tool.
Symptom
The change you can describe: spots, distorted mushrooms, poor development or an uneven crop. Record the change without assuming its cause.
Pattern
Where and when the change occurs: one bag, one material batch, an air outlet, a rack tier or the whole room. The comparison helps decide what to investigate.
Possible explanation
A cause to test against the evidence. Several causes may produce similar appearances; a familiar photograph does not rule out the alternatives.
Confirmation
Evidence that supports the cause, sometimes requiring a trained inspection or laboratory examination. A web checklist cannot replace those steps.

Learn it in this order

  1. Name the crop and stage

    Record the cultivated species, batch and development stage. Do not use a Button disease image as a general identification guide for every mushroom.

    Open this lesson →
  2. Compare affected and unaffected areas

    Use matching crop age, lighting and camera distance. Photograph the whole bed, the affected area and a healthy comparison before routine work changes the evidence.

    Open this lesson →
  3. Check the recent history

    Record when the change began, watering, handling, material changes and available measurements. Separate what you observed from what somebody suspects.

    Open this lesson →
  4. Choose a safe next investigation

    Limit unnecessary movement of suspect material, seek advice about containment and ask the laboratory how to submit a sample. Do not invent a spray recipe from a photograph.

    Open this lesson →

Work through an example

Brown cap marks: ask what happened before naming them

The situation
Two Button mushroom trays have brown marks. One was handled during picking; the other remained in the room after watering. The colour alone is not enough to decide whether the causes match.
Think it through
Compare when the marks appeared, whether caps stayed wet, where handling occurred and whether new unhandled mushrooms develop similar marks. Persistent surface moisture is relevant to bacterial blotch, but similar-looking spots can have other causes.
Your next decision
Keep labelled photographs and the history for the adviser. Do not declare the crop safe to sell or identify a pathogen from this comparison. Use the published photo references as clues, not a diagnosis.
Check your understanding

Try answering first, then open the explanation.

Does white growth automatically mean healthy mushroom mycelium?

No. Colour alone is insufficient. Compare the crop, stage, location and progression, and obtain a competent examination if the growth is unexpected.

Should I change temperature, watering and ventilation together to see what works?

Do not experiment with several uncontrolled changes. Address immediate safety or containment needs first, then use a documented assessment and a competent crop-management plan.

What if the cause is still uncertain?

Record the uncertainty and ask a qualified mushroom adviser or laboratory what evidence is needed. Uncertainty is not permission to use an unverified treatment.

Learning sources and limits

Editorial teaching explanation, not an independently reviewed operating protocol. Worked scenarios are illustrative.

Continue to the detailed walkthrough ↓
The full field guide

Investigate a crop problem without losing the evidence

Describe the pattern, protect the remaining crop, compare possible causes and prepare a useful record for a crop specialist.

Choose a picture to understand that part of the process.

  1. 01Capture the pattern
  2. 02Limit movement
  3. 03Compare locations
  4. 04Close the loop

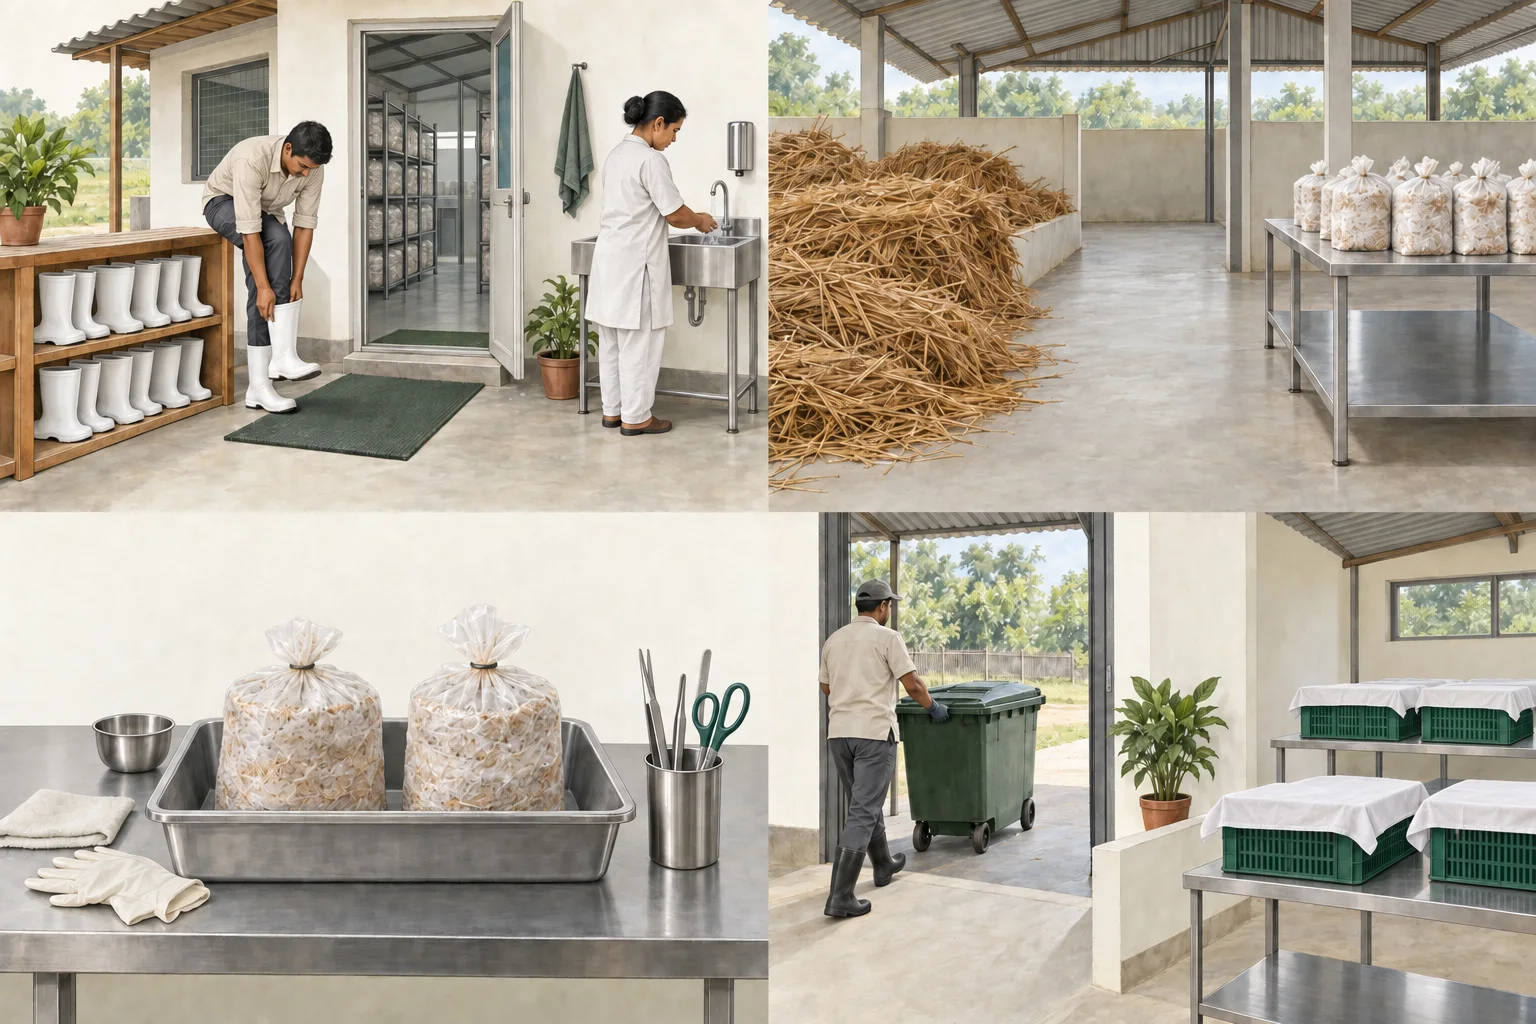
AI-generated teaching illustrations · Not photographs of actual farms

Chapter 01

Describe what changed before naming a disease

Write the mushroom species, crop stage, first observation date and affected material. Describe what is visible: slowed colonisation, altered colour, damaged caps, soft tissue, poor pinning or insects. Include how many bags or which bed area appear affected and whether the pattern is expanding. These observations are more useful than writing a disease name inferred from one image.

Take a room overview, a view of the affected bed or bags, a close view and a healthy comparison at the same stage. Keep lighting and distance consistent. Mark the affected area on a room map. Do not open suspect bags or move material through clean areas simply to improve a photograph. Ask the receiving specialist how to collect and send a sample when one is required.

Construct a short timeline of spawning, casing, watering, ventilation changes, new deliveries, equipment failures and movement between rooms. A cause must fit both the visible signs and the history. A laboratory result, crop inspection or additional measurements may be needed to distinguish look-alike problems.

Chapter 02

Protect the workflow while the cause is investigated

Reduce unnecessary movement from affected areas to clean work. Use the farm's agreed handling route and clean tools between tasks. Give staff a clear description of the affected area so it is not harvested, watered or visited as though nothing has changed. Handle waste under the established crop-health procedure; improvising removal can distribute contaminated material.

Keep product quality and worker safety separate from the wish to save a crop. Escalate unusual spoilage, widespread deterioration, unidentified contamination or exposure concerns to the appropriate specialist. Do not apply a chemical because a picture resembles a disease. Any proposed use must match the current authorised crop use and label, and the person recommending it must understand the actual problem.

Useful low-disturbance checks
PatternQuestions to compareEvidence that helps
Several rooms after one deliveryDo they share spawn, compost, casing or transport?Lot IDs and receipt records
One edge or rack levelDoes air, water, temperature or access differ here?Room map and matched readings
Sudden change after an operationWhat changed, where and when?Shift log and before/after photos
Repeated insect activityAre entry points, waste or incoming materials involved?Identified monitoring points and trends
Chapter 03

Compare explanations and look for evidence against them

Separate biological causes from environmental, material and handling causes. Several can coexist. For example, cap damage can follow handling, persistent wetness or a crop-health problem; appearance alone may not separate them. Ask what observation would make each explanation less likely. Healthy beds using the same compost may be informative, but they do not automatically clear that compost if the handling and environment differed.

For each possible cause, list a check, the result and what remains unresolved. Do not replace an unknown with a precise-looking confidence percentage. Send the record to the specialist with a specific question: what further evidence is needed, what can be done immediately, and what would confirm the identification? This produces a better consultation than asking for a medicine against a photograph.

Chapter 04

Close the investigation with a prevention change

A useful report states the finding, its confidence, what action was taken and the result. If the cause was not established, retain that uncertainty. Review whether receiving checks, room turnaround, staff movement, water management, pest exclusion or record keeping would have detected the problem earlier.

Track recurring problems by crop stage and material lot. Compare rates using a consistent denominator, such as affected bags out of bags received, rather than only the count of photographs. Assign the preventive change to someone and check whether the next crop follows it. Cleaning instructions and monitoring sheets have value only when their use can be observed.

  1. 01

    Detect

    Describe and map the first signs.

  2. 02

    Protect

    Use the agreed hygiene and movement controls.

  3. 03

    Investigate

    Compare material, environment, handling and biological explanations.

  4. 04

    Learn

    Record the finding and verify a specific prevention change in the next crop.

Chapter sources & scope

These are educational explanations, not an independently reviewed operating protocol. Worked examples do not predict your yield or income.

Back to the chapter list ↑

Understand the topic

The key ideas, at a glance.

Use this resource to connect symptoms to biology, compost, casing, climate, pests, hygiene and engineering through evidence.

Part 01

Quick recognition

Use mushroom crop health to connect symptoms to biology, compost, casing, climate, pests, hygiene and engineering through evidence. Recognition begins the investigation; it does not confirm a cause.

  • Observe early, developing and advanced signs
  • Map distribution and progression
  • Compare biological and abiotic causes
  • Confirm before high-risk action
Illustration of an operator photographing an uneven crop beside a record sheet.
AI teaching illustrationCapture the pattern

The location and pattern of symptoms are useful evidence. A close-up alone leaves out the batch, room and timeline.

Conceptual explanation—not a real farm photograph, diagnostic finding or construction specification.
Part 02

What to record

Capture crop stage, crop day, room, rack, layer, pattern, first observation, progression, compost and casing batches, watering, chemistry, pests and timestamped environmental readings.

Illustration of organised cleaning tools and an entry-footwear area.
AI teaching illustrationClose the loop

Entry routines and dedicated tools are part of prevention. A written procedure only helps when people actually follow it.

Conceptual explanation—not a real farm photograph, diagnostic finding or construction specification.
Part 03

Could it be something else?

Compare visual appearance with spatial pattern, progression, environmental history, process history and missing expected signs. Colour or one photograph is weak evidence.

Part 04

Evidence still needed

State the unanswered questions and next measurement. Useful evidence can be visual, environmental, spatial, temporal, microscopic, laboratory, molecular, trap-based or process-history based.

Part 05

Immediate safe direction

Document the affected area, avoid unnecessary disturbance or cross-room movement, isolate suspect tools, inspect adjacent areas and preserve representative evidence. Do not spray automatically.

Part 06

Root-cause review

Trace the visible problem through water, evaporation, airflow, sensor placement, compost, casing, staff movement, flies, tools or room design where evidence supports the connection.

Part 07

Chemical and regulatory boundary

Historical management literature is separated from current practice. No crop-protection dose is published unless the exact product, formulation, mushroom crop label, target, method, harvest interval, worker-safety information and current Indian status are verified.

Part 08

When remote guidance is inadequate

Seek technical inspection or laboratory support for rapid unexplained loss, repeated outbreaks, suspected virus, unknown mould, severe pests, chemical injury, multiple affected rooms or unresolved contradictions.

Keep exploring

Every part of this topic.

Choose the stage, material or decision you need to understand next.

01

What Are You Seeing?

An evidence-led guide to begin with a precise crop observation instead of a disease name.

02

Differential Diagnosis

An evidence-led guide to compare plausible biological and non-biological causes using supporting and negative evidence.

03

Crop Health Prevention

An evidence-led guide to apply prevention, exclusion, hygiene, monitoring and root-cause correction before treatment.

04

Production Hygiene

An evidence-led guide to separate cleaning, sanitation, disinfection and crop protection by purpose and evidence.

05

Farm Biosecurity

An evidence-led guide to control people, material, tool, air, water, pest and waste movement across proportional risk zones.

06

Crop Health Monitoring

An evidence-led guide to detect change from normal through daily observations, mapped measurements and traceable trends.

07

Crop Health Glossary

An evidence-led guide to use pathology, pest and biosecurity terms consistently without turning labels into diagnoses.

Go deeper

Technical reference, records and tools.

Detailed crop-stage information, parameters, diagrams and specialist tools are kept together below. This material retains its source conditions and review limits.

Open the complete technical reference
Crop health

Mushroom Crop Health

An evidence-led guide to connect symptoms to biology, compost, casing, climate, pests, hygiene and engineering through evidence.

Evidence postureExternal specialist review not recordedNo single-photo diagnosisNo operational chemical doseEditorially published
Button mushroom · Photo reference and management

See the symptom. Check the cause. Act carefully.

Real research photographs with practical, nonchemical first steps. These examples come from published studies, not MushroomWale farms. Resemblance is a clue, not confirmation of disease in your crop.

  1. 01Observe the crop and record the pattern
  2. 02Limit transfer to clean areas
  3. 03Check the diagnosis and follow a response plan
  4. 04Review the next crop for recurrence
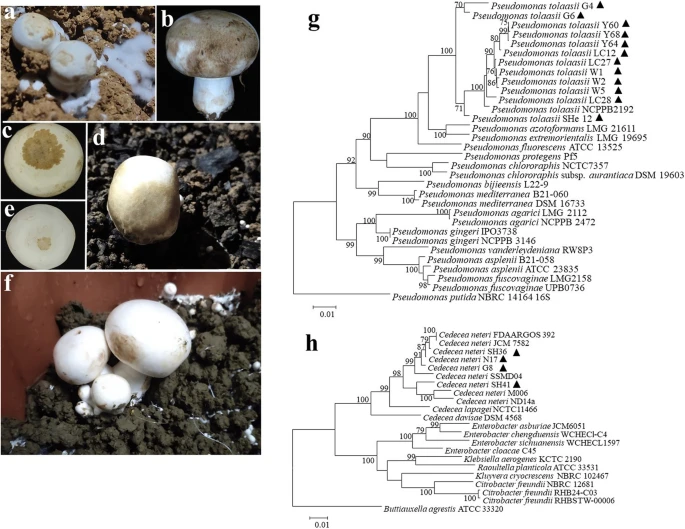
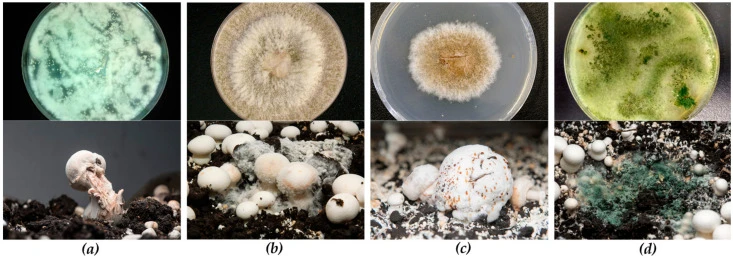
Research reference: a malformed Button mushroom with a split stem, captioned as dry bubble in Gea et al. Figure 1a.
Published research photographPanel 1a, lower photograph. Display cropped; no symptom retouching.Gea, Navarro, Santos, Diánez & Carrasco (2021), Figure 1, Microorganisms 9:585CC BY 4.0The publication identifies crop symptoms in the lower row; the upper row contains cultures. Only the crop photograph is shown here.

Dry bubble

Look for malformed mushrooms, split stems or wart-like growths. Later infection can appear as grey-brown cap spots; the appearance changes with crop stage.

What to do first
Mark the patch and do not pick out or handle dry bubbles. Avoid splashing exposed affected tissue. Have a trained supervisor contain the patch using the linked extension procedure.
Reduce the chance of recurrence
Keep casing, casing equipment and clean tools protected from contaminated dust and debris. Check fly control and movement of people between rooms.
What can look similar?
Wet bubble and other causes of spotting can look similar. A photograph cannot identify the pathogen; ask for specialist examination when the pattern is unclear.
What to record
Record when the first affected mushrooms appeared, their bed positions, watering history and whether new spots developed nearby.
Research reference: a large malformed white mass with amber droplets, captioned as wet bubble in Gea et al. Figure 1c.
Published research photographPanel 1c, lower photograph. Display cropped; no symptom retouching.Gea, Navarro, Santos, Diánez & Carrasco (2021), Figure 1, Microorganisms 9:585CC BY 4.0The publication identifies crop symptoms in the lower row; the upper row contains cultures. Only the crop photograph is shown here.

Wet bubble

Irregular swollen tissue, severely distorted mushrooms and amber droplets are useful clues. Decay can develop as affected tissue deteriorates.

What to do first
Mark the area and avoid splashing it. Once wet bubble is identified, trained staff can carefully enclose local affected material in a disposable bag, seal it and follow the farm's containment and disposal procedure.
Reduce the chance of recurrence
Protect casing and water supplies from soil, dust and crop debris. Keep clean equipment away from contaminated floors and spent material.
What can look similar?
Do not apply this removal approach to an unidentified bubble: dry bubble handling differs. Ask a crop-health specialist to distinguish them.
What to record
Record the casing lot, first affected location, water source, spread after watering and photographs before intervention.
Research reference: white cottony growth spreading across mushrooms and casing, captioned as cobweb in Gea et al. Figure 1b.
Published research photographPanel 1b, lower photograph. Display cropped; no symptom retouching.Gea, Navarro, Santos, Diánez & Carrasco (2021), Figure 1, Microorganisms 9:585CC BY 4.0The publication identifies crop symptoms in the lower row; the upper row contains cultures. Only the crop photograph is shown here.

Cobweb disease

Watch for an expanding cottony surface growth across casing and mushrooms. Older growth may become powdery, with spotting or a pinkish tinge.

What to do first
Mark the patch before routine watering. Do not brush, blow or spray exposed growth. Arrange gentle containment by trained staff, following the extension procedure and the room's crop-management plan.
Reduce the chance of recurrence
Inspect before watering, control dust and crop debris, and clean equipment between rooms. Review how air movement and watering could carry material from an affected patch.
What can look similar?
Normal mushroom mycelium and other moulds may look white. Rate of spread, location and examination of samples matter more than colour alone.
What to record
Photograph the same marked area over time. Note nearby spotting, recent watering and which rooms shared tools or staff.
Research reference: green-sporulating growth in a Button mushroom crop, captioned as green mould in Gea et al. Figure 1d.
Published research photographPanel 1d, lower photograph. Display cropped; no symptom retouching.Gea, Navarro, Santos, Diánez & Carrasco (2021), Figure 1, Microorganisms 9:585CC BY 4.0The publication identifies crop symptoms in the lower row; the upper row contains cultures. Only the crop photograph is shown here.

Green mould observation

A dense white patch may later become green as spores form. Poor cropping can accompany the affected area, but colour does not identify a mould species.

What to do first
Flag the batch and restrict movement of affected material, tools and staff into clean areas. Do not shake bags or brush spores off beds. Obtain advice on containment and whether the crop should continue.
Reduce the chance of recurrence
Review compost preparation, spawning hygiene and batch history together. Check cleaning and the validated end-of-crop treatment before loading another crop.
What can look similar?
Several moulds can appear green. Laboratory identification may be needed to establish whether Trichoderma is involved and which species it is.
What to record
Record whether growth is in compost, casing or surface debris, which input lots are shared, and whether other rooms from the same batch are affected.
Research reference: brown surface blotching on a naturally affected mature Button mushroom, Huang et al. Figure 1b.
Published research photographPanel 1b, natural symptoms. Display cropped; no symptom retouching.Huang, Huang, Nie & Liu (2024), Figure 1b, Phytopathology Research 6:21CC BY 4.0Panel b shows naturally affected mature Button mushrooms from the study in Guangxi, China, not an Indian farm or an inoculation experiment.

Bacterial blotch

Yellow-brown to dark brown superficial patches may occur on caps, including places where mushrooms touch or surfaces remain wet.

What to do first
Check actual cap wetness after watering and look for condensation. Correct water timing and air distribution with the crop supervisor so surfaces can dry without desiccating the crop.
Reduce the chance of recurrence
Avoid persistent wet surfaces, uncontrolled temperature swings and splash transfer. Clean handling equipment and compare conditions across the room, not only at the wall sensor.
What can look similar?
Bruising, fungal spots and other bacteria can produce browning. The photographed study found more than one bacterial cause; matching a picture is not a species diagnosis.
What to record
Note when spotting appears relative to watering, picking and packing. Record wetness, condensation and affected positions before changing settings.

From symptom to cause

A first look, not a diagnosis. Source: ICAR-DMR manual and disease bulletin.

What you seeLikely causeFirst step
Long stems, small capsCO₂ too high (above about 1,500 ppm)More fresh air
Green patches on compostTrichoderma; low pH or leftover ammoniaIsolate, remove; check next batch
No pins after casingRoom not aired and cooled16 to 18 °C, ventilate
Brown sunken spots on capsBacterial blotch; wet capsDry the surface, humidity under 85%
White wet lumpsWet bubble from casingSalt, remove; steam next casing
Small fliesSciarid or phorid fliesScreens, light traps, hygiene
Picture → explanation → field task

Keep clean and suspect work separate

AI-generated educational illustrations. Not actual farm photographs, diagnostic evidence or construction specifications.

Generated illustration of dedicated work footwear and a handwashing basin at a farm entrance.
01

Make clean entry a routine

Clean entry has a place and a repeatable sequence. Footwear, hands and movement between areas are part of farm hygiene. The illustration does not demonstrate a validated disinfection process.

Try this on your farm

Assign the entry routine, provide suitable facilities and check that visitors and workers follow it.

Generated illustration of raw straw separated from closed cultivation bags on a different bench.
02

Protect prepared material

Raw inputs and protected prepared material are separated. Treatment does not protect a substrate indefinitely. Handling afterwards can introduce contamination.

Try this on your farm

Keep work areas, tools and movement routes separated. Label batches so a later problem can be traced to its preparation history.

Generated illustration of two closed cultivation bags in a washable tray with dedicated tools.
03

Keep suspect bags closed

A separate tray helps identify material being held for investigation. The bags are illustrative and not diagnosed. Opening, shaking or smelling suspect material is not a confirmation method.

Try this on your farm

Mark the batch, limit movement and seek qualified advice on sampling or disposal. Do not return dedicated tools to clean work without the appropriate procedure.

Generated illustration of a covered waste tub leaving a separate area away from covered harvest crates.
04

Plan the spent-material route

Used material and saleable harvest follow different handling paths. A disposal route can undo clean-work separation if it crosses incoming materials or harvest handling.

Try this on your farm

Map the exit route and cleaning responsibility. Check the actual workflow during a busy room turnaround, not only on a drawing.

Symptom-first entry

What are you seeing?

Choose the affected part. The next question should reduce uncertainty.

Crop-health investigation loop

A visible symptom is the beginning, not the conclusion.

  1. 1Observe
  2. 2Measure
  3. 3Differentiate
  4. 4Verify
  5. 5Find root cause
  6. 6Manage
  7. 7Prevent recurrence

Disease development needs context

A pathogen finding alone does not describe the whole outbreak.

Susceptible hostSpecies, strain and crop stage
+
PathogenIdentity, inoculum and pathway
+
Favourable environmentWater, temperature, airflow and time
=
Disease developmentExpression depends on their interaction

Infectious or non-infectious?

These are tendencies, not absolute laws.

Infectious pattern may show

  • Progression over time
  • Localized spread
  • Characteristic signs
  • Recurrence through a pathway

Environmental pattern may show

  • Rack, layer or wall alignment
  • Correlation with airflow or sensors
  • Shared response to a control change
  • Rapid improvement after physical correction
Internal quality view

Crop-health governance dashboard

Record status is visible. No demo farm value is presented as live data.

Disease records

4 editorially published

3 viral records remain pending specialist pathology review

Chemical records

0 operational doses

Regulatory review required

Images

0 diagnostic atlas images

Confirmed rights and diagnosis required

Diagnostic rules

6 published editorial rules

5 source-linked; none represented as externally reviewed

Explore this system

Move from the hub to the most specific evidence record.

Crop health

What Are You Seeing?

An evidence-led guide to begin with a precise crop observation instead of a disease name.

Open resource
Differential diagnosis

Differential Diagnosis

An evidence-led guide to compare plausible biological and non-biological causes using supporting and negative evidence.

Open resource
Crop health

Crop Health Prevention

An evidence-led guide to apply prevention, exclusion, hygiene, monitoring and root-cause correction before treatment.

Open resource
Crop health

Production Hygiene

An evidence-led guide to separate cleaning, sanitation, disinfection and crop protection by purpose and evidence.

Open resource
Crop health

Farm Biosecurity

An evidence-led guide to control people, material, tool, air, water, pest and waste movement across proportional risk zones.

Open resource
Crop health

Crop Health Monitoring

An evidence-led guide to detect change from normal through daily observations, mapped measurements and traceable trends.

Open resource
Crop health

Crop Health Glossary

An evidence-led guide to use pathology, pest and biosecurity terms consistently without turning labels into diagnoses.

Open resource
01

Quick recognition

Use mushroom crop health to connect symptoms to biology, compost, casing, climate, pests, hygiene and engineering through evidence. Recognition begins the investigation; it does not confirm a cause.

  • Observe early, developing and advanced signs
  • Map distribution and progression
  • Compare biological and abiotic causes
  • Confirm before high-risk action
02

What to record

Capture crop stage, crop day, room, rack, layer, pattern, first observation, progression, compost and casing batches, watering, chemistry, pests and timestamped environmental readings.

03

Could it be something else?

Compare visual appearance with spatial pattern, progression, environmental history, process history and missing expected signs. Colour or one photograph is weak evidence.

04

Evidence still needed

State the unanswered questions and next measurement. Useful evidence can be visual, environmental, spatial, temporal, microscopic, laboratory, molecular, trap-based or process-history based.

05

Immediate safe direction

Document the affected area, avoid unnecessary disturbance or cross-room movement, isolate suspect tools, inspect adjacent areas and preserve representative evidence. Do not spray automatically.

06

Root-cause review

Trace the visible problem through water, evaporation, airflow, sensor placement, compost, casing, staff movement, flies, tools or room design where evidence supports the connection.

07

Chemical and regulatory boundary

Historical management literature is separated from current practice. No crop-protection dose is published unless the exact product, formulation, mushroom crop label, target, method, harvest interval, worker-safety information and current Indian status are verified.

08

When remote guidance is inadequate

Seek technical inspection or laboratory support for rapid unexplained loss, repeated outbreaks, suspected virus, unknown mould, severe pests, chemical injury, multiple affected rooms or unresolved contradictions.

Evidence and review

Trace the claim and its limits.

Pathogen biology, dated advisories and current regulatory status are stored separately.

Institutional Reference

ICAR-DMR Technical Bulletin Library

Institutional publication index for disease, farm-design, post-harvest and spent-substrate references.

Open source
Current Advisory

ICAR-DMR Crop Advisory

Dated Indian seasonal crop-health, hygiene and pest observations.

Open source
Institutional Reference

Directorate of Plant Protection, Quarantine and Storage regulatory functions

Indian pesticide registration and regulatory-governance context under the Insecticides Act and Rules.

Open source

Historical management reference: old disease literature may describe treatments that are no longer authorised, labelled or appropriate. It is never an operational instruction here.

Chemical governance is a publication gate.

No operational pesticide, fungicide, insecticide, disinfectant or fumigant dose is published. Historical references are not current labels.

Current operational dose
Not published
Mushroom crop label
Not established by this record
Review status
Regulatory review required

Read the evidence

Sources & review.

Editorial update: 2026-08-23. Independent technical review is not recorded for this entry.

  1. ICAR-DMR Technical Bulletin Library

    ICAR-Directorate of Mushroom Research

  2. ICAR-DMR Crop Advisory

    ICAR-Directorate of Mushroom Research · 2026

  3. Directorate of Plant Protection, Quarantine and Storage regulatory functions

    Directorate of Plant Protection, Quarantine and Storage · 2024

Reading a source is not the same as applying its instructions to every farm. Confirm species, strain, crop stage, system, region and publication date. Old chemical recommendations are not current-use instructions.

See something that needs correcting? Tell us →