Understand why a milky mushroom crop includes a separate casing operation. Keep preparation, colonisation, casing and fruiting in the right order instead of applying an oyster method unchanged.
Read one page, study its picture, then turn to the next. Use Contents whenever you want a particular topic.
Start here
Practical workbook
What you need before starting
Keep these beside you while you learn. You do not need to buy equipment just to read this book.
01
Confirmed Calocybe indica strain and applicable method
02
Separate substrate and casing lot records
03
Stage-specific room observations and clean handling arrangements
Understand the basics
Look closely
Three mushrooms, three different crop arrangements
The picture compares cultivation arrangements, not three versions of the same recipe. Oyster clusters can develop from openings in colonised bags. A common Milky method adds a casing layer after straw colonisation. Paddy Straw methods can use prepared straw beds. Each requires its own material preparation and crop management.
Before following an instruction, write its crop and method at the top of your notes. A direction about casing a Milky bed is not automatically a direction for an Oyster bag. Equally, a Button compost schedule does not describe every straw-based method.
Confirm the scientific species and supplied strain with the supplier. Common market names may cover different production choices. The illustration helps you compare arrangements; it cannot identify an unknown or wild specimen.
A preparation method includes what happens after treatment: cooling, moisture adjustment where applicable, handling, inoculation and containment. Treated material placed back beside dirty tools or raw inputs can be exposed again before the intended fungus establishes.
Plan the next container, work surface, tools and staff movements before starting. Follow the selected method for release and handling conditions; a container that is covered is not necessarily sterile, cool enough or suitable for inoculation.
Pasteurisation and sterilisation describe different process objectives. Neither word supplies a complete operating procedure. Do not improvise a pressure vessel or borrow a heating schedule from another load size, material or crop.
Water in the growing material, water vapour in the room air and liquid water on a mushroom surface are different observations. A humid room does not prove that the material contains enough water. A wet cap does not prove that the crop needs more mist.
Before adding water, identify the crop stage and material you intend to affect. Record the previous application and inspect representative locations using the method taught for that crop. Consider recent changes in temperature, ventilation and surface drying.
Also include the supply itself in the farm plan: source, storage, distribution, cleaning and any testing required for its intended use. Clear-looking water is not evidence that it is suitable for food-contact or cultivation operations. Use the applicable trained procedure rather than a universal daily litre figure.
Start with what you can show: crop and stage, date first noticed, number or area affected, location, recent operations and whether the pattern is spreading. Photograph a whole-room view, an affected area, an unaffected comparison and a close detail.
A brown mark, slow patch or unusual shape can have more than one explanation. Record relevant material lots, watering, environment and insect observations. Keep the distinction between “I saw this” and “I think this caused it”.
Follow the farm’s containment procedure while seeking qualified advice. Do not open suspect material just to smell it, move it through clean work, or choose a pesticide from a photograph. A specialist may require samples, records or testing before recommending action.
A warm-climate description is not permission to ignore measured conditions. Identify the strain, intended production period and buyer specification. The crop still needs stage-appropriate care and reliable daily attendance.
The process
Practical workbook
Check the substrate stage
Substrate preparation and protected inoculation establish the batch. Later observations should identify uneven or stalled development before the next operation hides the substrate beneath another layer.
The process
Practical workbook
Treat casing as its own operation
Casing has a different job from the food-bearing substrate. Its preparation, structure, application and watering history need separate attention. A room humidity reading cannot substitute for observing the casing.
The process
Practical workbook
Compare development and harvest
Follow marked bags from casing through visible development and picking. When development differs, compare material, room position and operations before assigning a cause. Marketable output, not the largest fruit body, determines the sales record.
In the field
Field notes
Check the crop, climate and buyer together
Milky mushroom, Calocybe indica, is a warm-condition crop with a casing stage. It should not be managed by copying the opening instructions for an oyster bag. Confirm species identity with the spawn supplier and obtain their stage-specific cultivation protocol. A warm regional climate does not prove that every room is suitable: a sun-heated roof, dense bag loading or a stagnant corner can create conditions unlike the outdoor weather.
Ask local buyers to evaluate the actual product, size and preparation they expect. Do not infer demand from button mushroom sales. Record whether buyers accept both caps and stems, the maturity they prefer, packaging, delivery quantity and payment period. Use a small complete crop to test these requirements before enlarging the room.
In the field
Field notes
Write it in your farm notebook
Keep the species and strain, indoor readings, proposed season, supplier instructions, buyer sample feedback and first-batch size in one planning sheet.
In the field
Field notes
Finish substrate colonisation before the next operation
Use a validated preparation and inoculation procedure for your substrate. Keep treatment, cooling and spawning records separate enough to trace a failed batch. When comparing colonisation, observe bags of the same age and material batch. A white patch at one edge does not establish that the whole substrate is ready for casing.
Before opening the bags, check development and arrange the clean work area, casing material and labels. Record abnormalities before disturbing the crop. Do not use an arbitrary number of days as the sole release rule; strain, substrate and actual conditions influence development. Escalate stalled or abnormal bags rather than casing over a problem to keep to the schedule.
In the field
Field notes
Treat casing as its own material and operation
Casing is a distinct surface layer, with its own preparation, physical structure and hygiene requirements. Keep its source, treatment and application records. Apply using the crop-specific method taught for that material. Uneven depth or unintended compaction changes the surface environment and makes later comparisons difficult.
Room relative humidity and casing water content are not interchangeable. Examine the layer and the developing crop, not only the controller. Record watering timing, method and affected areas. If only part of a bed dries, compare distribution, air exposure and layer uniformity before adding more water everywhere. Avoid treating standing water as evidence of good moisture management.
In the field
Compare the evidence
Three different places to investigate moisture
Three different places to investigate moisture
Location
Useful observation
Do not assume
Substrate
Preparation record and development through the bag
A wet casing proves adequate substrate moisture
Casing
Uniformity, physical condition and watering history
The room humidity reading describes water in the layer
Room and crop surface
Air distribution, condensation and pin condition
Higher humidity always solves a moisture problem
In the field
Field notes
Follow pin development through to a paid sale
Mark representative bags and compare where pins begin, how they develop and where losses occur. Photograph the same locations with a date and scale. When development is uneven, compare casing lot and application, watering, light and local air conditions. Several factors can produce similar visible symptoms, so preserve the observations and seek help with a specific question.
Harvest to the agreed buyer specification and keep grade weights separate. Review each batch using saleable kilograms, rejects, unsold quantity and payment records. If a new casing material is trialled, change it in a small labelled comparison under competent guidance while keeping other practices consistent. An uncontrolled whole-room change cannot show whether the material or another change caused the result.
In the field
Field notes
A useful comparison
Label two small comparable groups using the existing and proposed casing method. Record both application details and environmental differences. Compare crop development, losses, labour and buyer acceptance. This is a learning trial, not proof that the new material is generally superior.
In the field
Sources & further reading
Where the field guidance comes from
ICAR-IIHR cultivation publications: Crop-specific Indian training publications; obtain the protocol for your species, strain and method.
ICAR-DMR crop advisory: Milky mushroom casing and seasonal context; local protocols remain necessary. Chemical prescriptions are not reproduced.
Milky mushroom welcomes the heat that ruins a button crop. In the months when a button room needs a chiller, dudhiya keeps cropping in an ordinary shed.
By the end you can say which temperature window suits Calocybe indica.
By the end you can place a milky crop in the ICAR-DMR calendar.
By the end you can explain why button rules do not carry over.
Warm-Climate Context
Field notes
A mushroom that likes the heat
Milky mushroom is Calocybe indica, called dudhiya because the young mushroom is milk white. ICAR-DMR says one milky crop can be taken in almost all the plains of the country, leaving out the hills, wherever temperature stays between 25 and 40 C for some months.
That sentence is the whole species argument. White button fruits at 15 to 17 C air, which on a plain in April means a refrigeration plant. Milky fruits at 30 to 35 C and, in DMR's words, keeps producing even at 30 to 40 C. It matches weather you already have.
Warm-Climate Context
Field notes
Where the calendar puts it
The DMR seasonal folder gives months. On the north Indian plains a milky crop runs February to April and again July to September. In the mid hills it runs April to June. The high hills are not milky country.
The same folder places whole regions. In the coastal states oyster, paddy straw and milky grow in the natural climate all year, and central and western India can grow milky all year.
Warm-Climate Context
Field notes
Where the calendar puts it · continued
Read your district into that. A summer maximum near 35 C sits inside the band. Above 40 C for weeks you need shade, wet walls and early morning work.
Warm-Climate Context
Field notes
Two Indian answers on spawn run
Here the sources disagree, and you should know it before fixing a room temperature.
The DMR Hindi folder holds spawned bags in a dark room at 25 to 35 C with 80 to 90 percent humidity. TNAU Coimbatore specifies 22 to 25 C and 85 to 90 percent for the same stage. DMR's own species table gives 25 to 30 C.
Warm-Climate Context
Field notes
Two Indian answers on spawn run · continued
Treat the wide DMR band as what the fungus tolerates and the narrow TNAU band as what it prefers. Note what catches button growers: in milky the fruiting temperature is higher than the spawn run temperature. In most cultivated mushrooms it is the other way round.
Warm-Climate Context
Field notes
What the crop asks before you buy spawn
A milky crop is a chain of waits: 15 to 20 days of spawn run, 10 to 12 days of case run, then pinheads 3 to 5 days after mycelium reaches the casing top.
You need a dark room for the run and a lit room for cropping, clean chopped straw, a drum for hot water treatment, and casing soil prepared a week ahead. ICAR-DMR reports a biological efficiency near 100 percent, about one kilogram of fresh mushroom per kilogram of dry straw.
Warm-Climate Context
Field notes
What the crop asks before you buy spawn · continued
The last question is the buyer. Shelf life is 3 to 4 days without a cold chain.
Warm-Climate Context
Compare the evidence
Read the numbers in context
These figures belong to the named source and method. Historical costs are not current quotations. A value without its stage, material basis or measurement location is not a farm instruction.
Source-specific reference figures
What is measured
Value and basis
Source and limitation
Ambient window
25-40 °C
ICAR-DMR milky folder. Plains, for some months of the year
These figures belong to the named source and method. Historical costs are not current quotations. A value without its stage, material basis or measurement location is not a farm instruction.
Source-specific reference figures
What is measured
Value and basis
Source and limitation
Spawn run, DMR
25-35 °C
ICAR-DMR milky folder. Dark room, 80 to 90 percent humidity
Spawn run, TNAU
22-25 °C
TNAU Agritech portal. Same stage, a real disagreement
These figures belong to the named source and method. Historical costs are not current quotations. A value without its stage, material basis or measurement location is not a farm instruction.
Milky mushroom needs no compost, only clean straw, hot water and patience. The crop is decided in the two days before spawning.
By the end you can choose and treat straw for a milky crop.
By the end you can judge substrate moisture by hand.
By the end you can set the spawn rate and run bags to full colonisation.
Substrate & Spawn Run
Field notes
Which straw, and in what condition
ICAR-DMR lists wheat straw, paddy straw, sorghum, pearl millet and maize stalks and sugarcane bagasse as milky substrates. Cereal straw is what most growers use.
Condition matters more than choice. DMR is blunt: the material must be new, dry and not soaked by rain. Straw stacked through a monsoon already carries moulds, and pasteurisation kills only what it reaches.
Substrate & Spawn Run
Field notes
Which straw, and in what condition · continued
Chop the straw. The 2011 manual works with pieces of 2 to 4 cm, which pack evenly and hold water without becoming a wet mat.
New season straw, stored under cover and dry to the hand.
Substrate & Spawn Run
Field notes
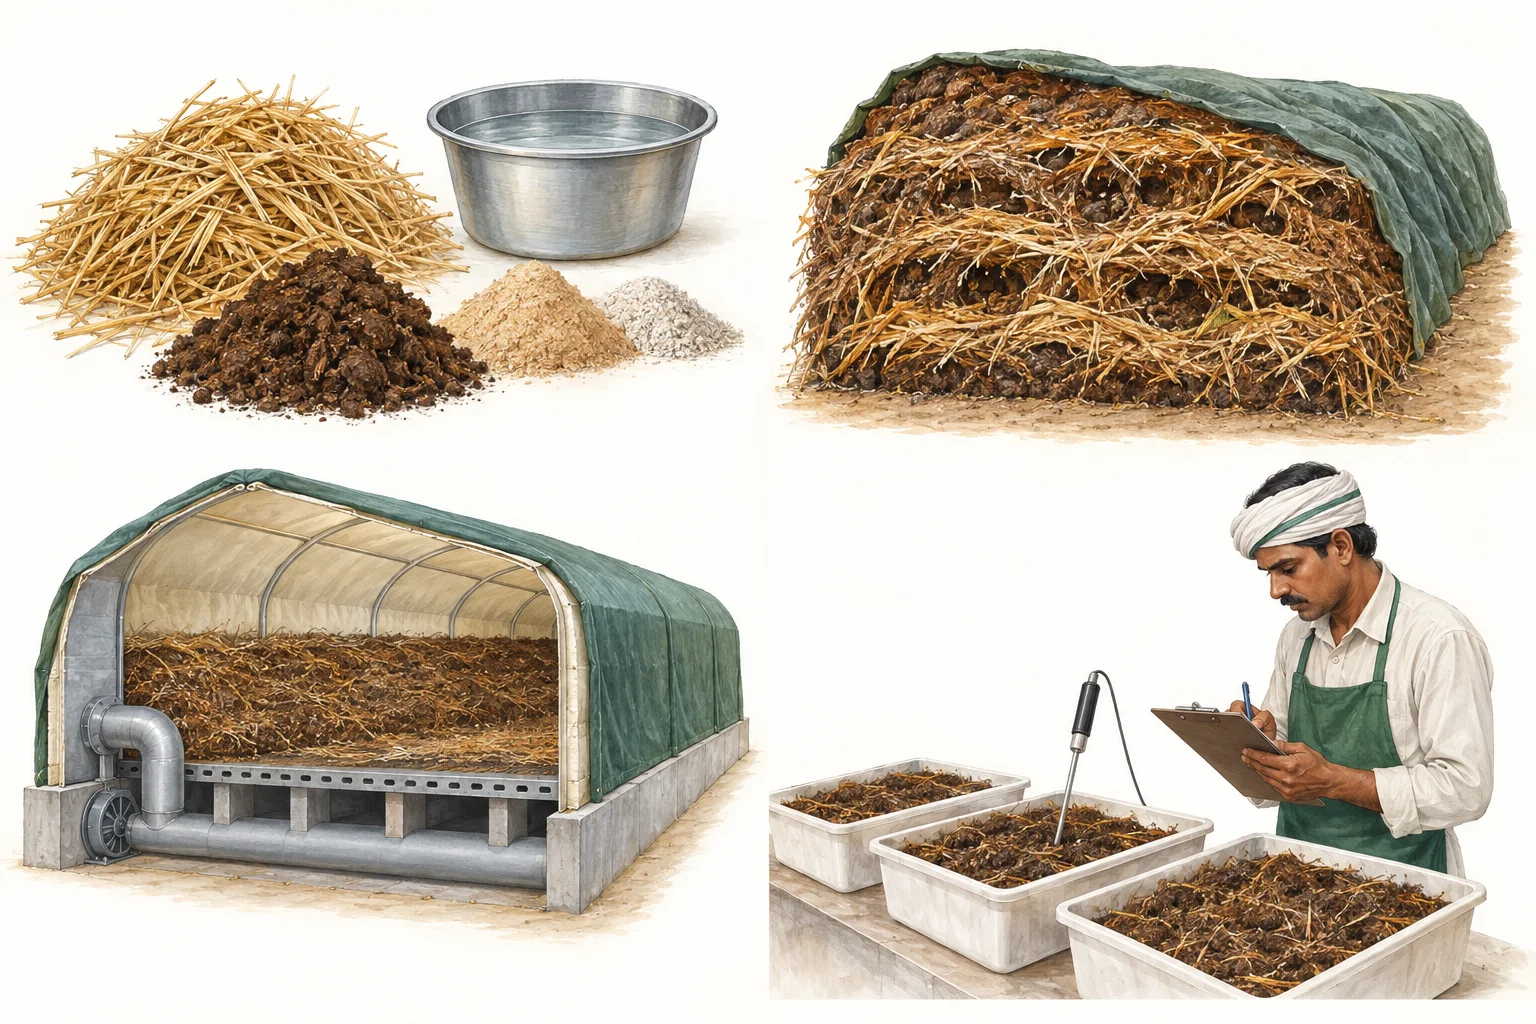
Soak, then pasteurise
Soaking comes first. The farmer folder keeps chaffed straw in gunny bags under clean water for at least 6 hours; the 2011 manual gives 8 to 16 hours. The straw must be wet through, not wet outside.
Then kill the competitors. The folder method is hot water: the filled bag goes into boiling water for 40 minutes, and the water must keep boiling the whole time. The manual states the same 40 minutes at 80 to 90 C. On a larger unit, steam raises the substrate to 65 C for 5 to 6 hours.
Substrate & Spawn Run
Field notes
Soak, then pasteurise · continued
DMR also describes chemical steeping. It uses fungicide and formalin, so check current label approval and state rules first.
Substrate & Spawn Run
Field notes
The squeeze test
Drain the treated straw on a clean floor and let it cool to hand temperature. Target moisture is 65 to 70 percent.
DMR gives the field test in plain words: press a handful hard. If no water runs out and your palm is only slightly damp, the moisture is right. If water drips, the bag will sour and mycelium will not run.
Substrate & Spawn Run
Field notes
The squeeze test · continued
Do not spread hot straw on bare earth. The folder washes and disinfects the cooling floor first. Work on a swept, washed surface with clean hands, and cover the straw if the yard is dusty.
Substrate & Spawn Run
Field notes
Spawning and the run
Milky takes a heavy dose: 4 to 5 percent of the wet substrate weight, which is 40 to 50 g of spawn per kilogram of wet straw. Folder and manual agree here.
The folder fills a polythene bag about 15 to 16 inch wide and 20 to 21 inch high with 4 to 5 kg of treated substrate, spreading spawn in layers 3 to 4 inch apart. TNAU uses a 60 by 30 cm bag with five straw layers.
Substrate & Spawn Run
Field notes
Spawning and the run · continued
Then leave them alone. Dark room, 15 to 20 days, bags closed. The manual says about 20 days to full colonisation, after which the bag is ready for casing.
Substrate & Spawn Run
Compare the evidence
Read the numbers in context
These figures belong to the named source and method. Historical costs are not current quotations. A value without its stage, material basis or measurement location is not a farm instruction.
Source-specific reference figures
What is measured
Value and basis
Source and limitation
Pre-soak
6 hours minimum
ICAR-DMR milky folder. The manual gives 8 to 16 hours
Hot water treatment
40 minutes
ICAR-DMR milky folder. Water keeps boiling throughout
These figures belong to the named source and method. Historical costs are not current quotations. A value without its stage, material basis or measurement location is not a farm instruction.
Source-specific reference figures
What is measured
Value and basis
Source and limitation
Steam pasteurisation
65 °C
ICAR-DMR manual, 2011. Held 5 to 6 hours in the substrate
These figures belong to the named source and method. Historical costs are not current quotations. A value without its stage, material basis or measurement location is not a farm instruction.
Source-specific reference figures
What is measured
Value and basis
Source and limitation
Spawn rate
4-5 % of wet weight
ICAR-DMR milky folder. 40 to 50 g per kg wet straw
Spawn run
15-20 days
ICAR-DMR milky folder. Dark room, bags kept closed
A fully white bag of milky mushroom will sit for weeks and give nothing. The casing layer is what turns colonised straw into mushrooms.
By the end you can prepare and disinfect a casing mixture.
By the end you can choose a casing depth and defend it.
By the end you can run the case run through to first pinheads.
Casing & Case Development
Field notes
Why a casing layer at all
Casing is a layer of treated soil spread over colonised substrate. The 2011 manual states its three jobs plainly: physical support, moisture, and a path for gases to escape from the substrate below.
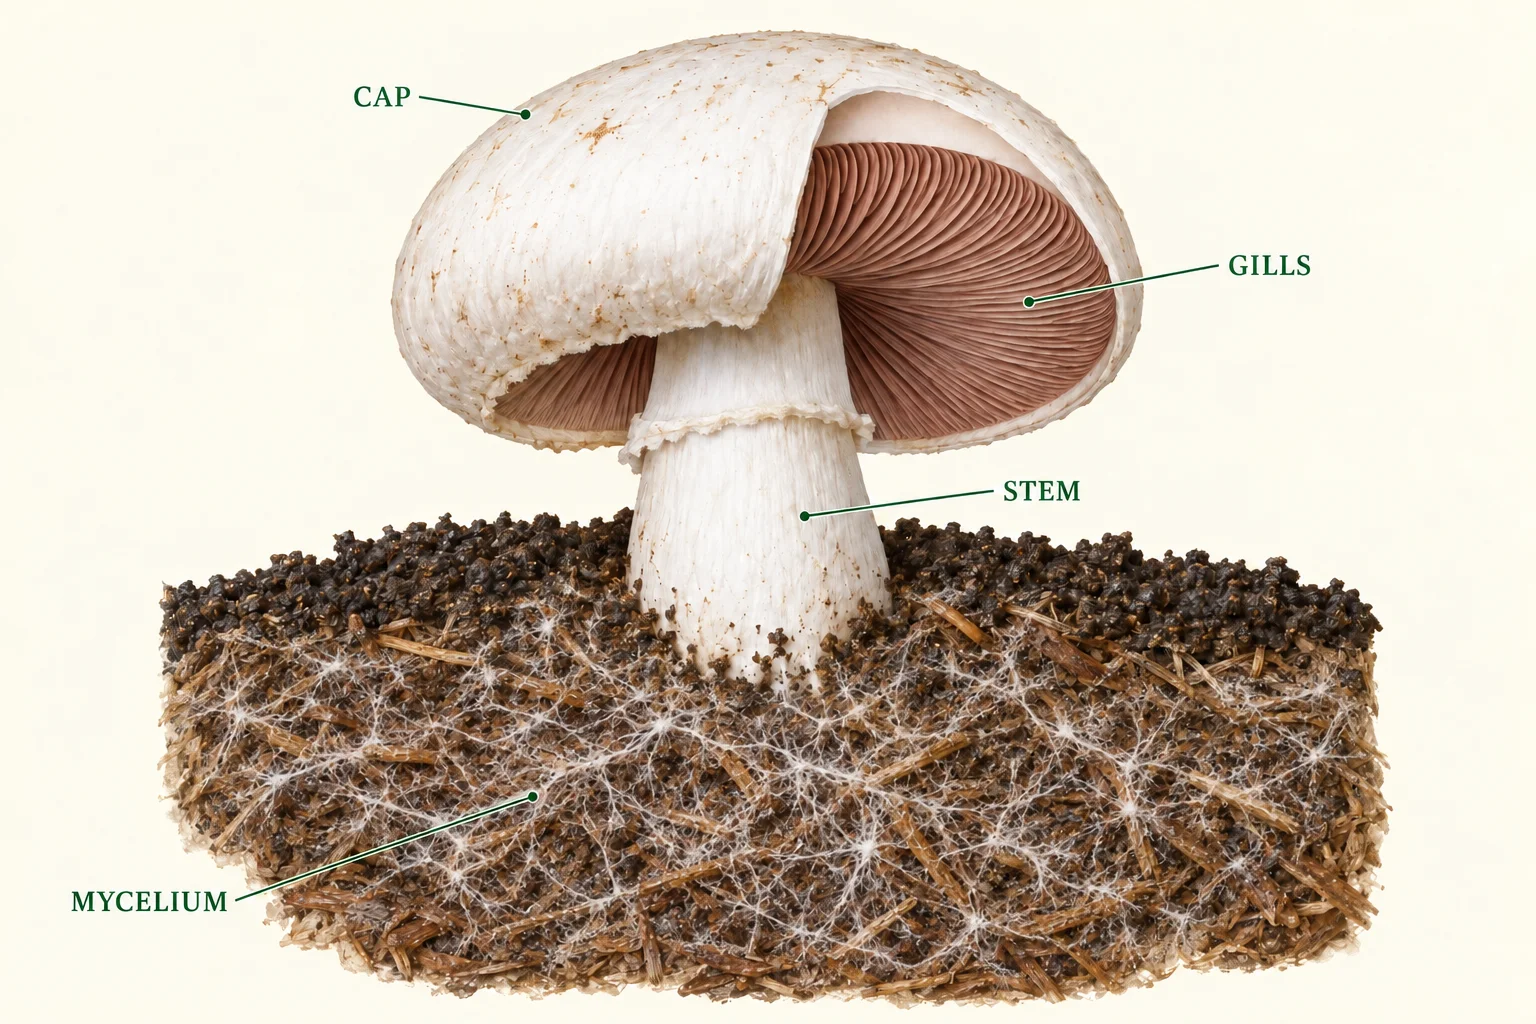
For milky it is not optional. Without casing the mycelium keeps growing sideways and never switches to making fruit bodies. The stage that follows is the case run, when mycelium climbs into the soil layer.
Casing & Case Development
Field notes
Why a casing layer at all · continued
Think of casing as a change of instruction, not as feeding. It carries almost no nutrition. It changes what the fungus is being asked to do.
Casing & Case Development
Field notes
The mixture and its pH
The DMR Hindi folder mixes three quarters loam soil with one quarter sand by volume, then adds chalk powder at 10 percent of the mixture weight. The 2011 manual prefers soil 75 percent plus sand 25 percent, and accepts coir pith with soil or farmyard manure with soil.
The chalk is not decoration. DMR sets milky casing pH at 7.8 to 7.9, adjusted with chalk. That is more alkaline than the 7.0 to 7.5 the same institute sets for button casing, so soil from the button shed is the wrong soil here.
Casing & Case Development
Field notes
The mixture and its pH · continued
Prepare the mixture about a week ahead, not on the morning of casing.
Casing & Case Development
Field notes
Disinfect the soil, whatever method you pick
Casing soil is the main doorway for wet bubble disease. DMR records that its spores survive up to three years in casing soil, so last season's soil is a risk, not a saving.
The heat route is one every grower can check: steam treatment of casing soil at 54.4 C for 15 minutes. TNAU steams casing soil in a pressure cooker for 45 minutes. The manual also allows autoclaving at 15 psi for one hour.
Casing & Case Development
Field notes
Disinfect the soil, whatever method you pick · continued
DMR's folder describes a chemical route using formalin and a fungicide under a polythene sheet. Approvals change, so confirm current label approval and state rules before using any chemical.
Casing & Case Development
Field notes
Depth, then the case run
Three Indian documents give three depths. The DMR farmer folder says 2 to 3 cm. The 2011 manual says 3 to 4 cm. TNAU says 1 cm, pressed gently.
Do not average them. Pick one, keep it the same across every bag, and write it down, because depth is one of the few things you fully control. An uneven layer gives early pins in the thin patches and nothing in the thick ones.
Casing & Case Development
Field notes
Depth, then the case run · continued
After casing, hold 30 to 35 C and 80 to 90 percent humidity. DMR reports 10 to 12 days for mycelium to spread through the casing, and pinheads 3 to 5 days after it reaches the top.
Casing & Case Development
Compare the evidence
Read the numbers in context
These figures belong to the named source and method. Historical costs are not current quotations. A value without its stage, material basis or measurement location is not a farm instruction.
Source-specific reference figures
What is measured
Value and basis
Source and limitation
Casing depth, DMR folder
2-3 cm
ICAR-DMR milky folder. One of three published Indian depths
Casing depth, manual
3-4 cm
ICAR-DMR manual, 2011. Same institute, deeper layer
These figures belong to the named source and method. Historical costs are not current quotations. A value without its stage, material basis or measurement location is not a farm instruction.
Source-specific reference figures
What is measured
Value and basis
Source and limitation
Casing depth, TNAU
1 cm
TNAU Agritech portal. Pressed gently after spreading
Casing pH
7.8-7.9 pH
ICAR-DMR manual, 2011. Button casing is 7.0 to 7.5
These figures belong to the named source and method. Historical costs are not current quotations. A value without its stage, material basis or measurement location is not a farm instruction.
Source-specific reference figures
What is measured
Value and basis
Source and limitation
Casing soil steaming
54.4 °C
ICAR-DMR wet bubble folder. Held 15 minutes against wet bubble
From here the crop tells you what it needs. Long stalks, small caps and spotted skins are all messages about light, air and water.
By the end you can judge whether the first pinning is on time.
By the end you can manage light, air and water during cropping.
By the end you can pick at the right size and pack for a short shelf life.
Light, Fruiting & Harvest
Field notes
What the first pins tell you
Once mycelium reaches the casing top, DMR reports pinheads within 3 to 5 days and about a week more to full size. TNAU, working in Tamil Nadu, reports buttons about 10 days after casing and harvest 7 days later.
Both are published Indian figures. What matters is your own count. If expected development is absent, investigate strain and stage, colonisation, casing preparation and moisture, room conditions and crop health. Timing alone does not identify the cause.
Light, Fruiting & Harvest
Field notes
What the first pins tell you · continued
So write the casing date on the bag itself. Without that date the first pinning is a surprise you cannot repeat.
Light, Fruiting & Harvest
Field notes
Light is a requirement, not decoration
Milky mushroom fruits in light. The 2011 manual says light should be given for the maximum duration through the whole cropping period, but it gives no lux figure and no photoperiod.
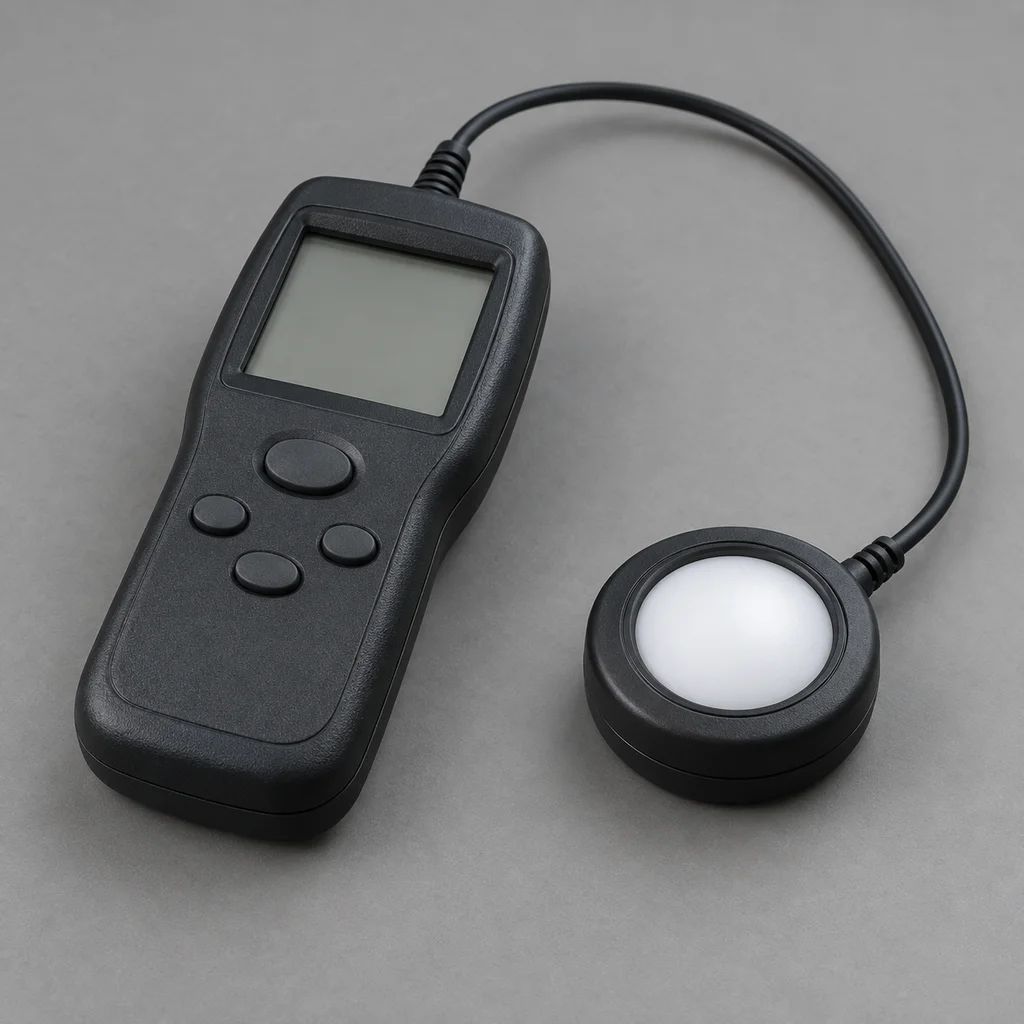
TNAU is the only Indian source read here that puts a number on it: 2500 to 3000 lux for button formation, with cased beds kept inside a blue polythene tent. That is bright, roughly a shaded verandah, far more than a dim store room.
Light, Fruiting & Harvest
Field notes
Light is a requirement, not decoration · continued
In a dark room pins either fail to form or come up on long thin stalks. Diffused window light or tube lights on a timer both work. Direct afternoon sun on the bags does not.
Light, Fruiting & Harvest
Field notes
Air and water during cropping
The 2011 manual asks for a minimum of 3 to 4 air changes per hour once fruiting starts. That is far less than a button room needs, but it is not zero, and a sealed room gives long stalks with small caps.
Hold 30 to 35 C. The folder keeps humidity at 80 to 90 percent; the manual's water management section narrows it to 80 to 85 percent during cropping.
Light, Fruiting & Harvest
Field notes
Air and water during cropping · continued
Water the casing surface, not the mushrooms. Fine mist on walls and floor lifts humidity without leaving a film on caps, and a wet cap in warm air is where bacterial spotting starts.
Light, Fruiting & Harvest
Field notes
Picking and packing
DMR's two documents give two picking sizes. The farmer folder calls the cap mature at 5 to 6 cm; the 2011 manual harvests at 7 to 8 cm diameter. Pick by twisting with thumb and finger, then trim the soiled stem base with a clean knife.
ICAR-DMR reports a biological efficiency close to 100 percent, about one kilogram of fresh mushroom per kilogram of dry straw. That is a reported figure, not a promise.
Light, Fruiting & Harvest
Field notes
Picking and packing · continued
Pack into polythene with at least four holes of 4 to 5 mm. Shelf life is 3 to 4 days without loss of colour, so plan the sale before the pick.
Light, Fruiting & Harvest
Compare the evidence
Read the numbers in context
These figures belong to the named source and method. Historical costs are not current quotations. A value without its stage, material basis or measurement location is not a farm instruction.
These figures belong to the named source and method. Historical costs are not current quotations. A value without its stage, material basis or measurement location is not a farm instruction.
Source-specific reference figures
What is measured
Value and basis
Source and limitation
Air changes
3-4 per hour
ICAR-DMR manual, 2011. Minimum once fruiting begins
Harvest cap size
5-6 cm
ICAR-DMR milky folder. The manual picks at 7 to 8 cm
These figures belong to the named source and method. Historical costs are not current quotations. A value without its stage, material basis or measurement location is not a farm instruction.
Source-specific reference figures
What is measured
Value and basis
Source and limitation
Biological efficiency
100 %
ICAR-DMR milky folder. About 1 kg fresh per kg dry straw, as reported
Casing is simply more substrate. Study the casing lesson and keep its material record separate.
A fixed delay proves one cause. Investigate the full process and local conditions before deciding.
Practise and review
Practical workbook
Make a two-material batch record
Trace one substrate lot and one casing lot through several marked bags. Show how you would investigate a problem appearing only after casing.
Sources and next steps
Sources & further reading
Keep learning with the field guides
English editorial teaching material. Independent technical review and full Hindi translation remain pending. Reading or completing an exercise is not proof of practical competence.
Illustrations are not diagnostic evidence, construction drawings or operating specifications. Use species-, strain- and method-specific guidance for practical work.
English learning edition · Independent technical review pending. Keyboard: focus the reading page and use ← / →. Page turning does not mark practical competence.
Milky mushrooms: substrate, casing and crop development | MushroomFarming.in