


Phase II
Phase II is four jobs done in one room, in one order, with the door shut. Getting the order wrong costs the whole batch.
- By the end you can list the four stages with their temperature and time.
- By the end you can explain why heating and cooling rates are controlled.
- By the end you can state what must be true before compost leaves the tunnel.
Compost temperature from day 0 to spawning
Long-method heap 65 to 70 °C with turnings, then pasteurisation at 58 to 59 °C for 4 to 6 hours, conditioning at 45 to 52 °C, cooling to 25 to 30 °C for spawning. Source: ICAR-DMR manual 2011.
Read numerical examples with their source, method and crop context. They are not universal operating instructions. Historical prices are not current quotations.
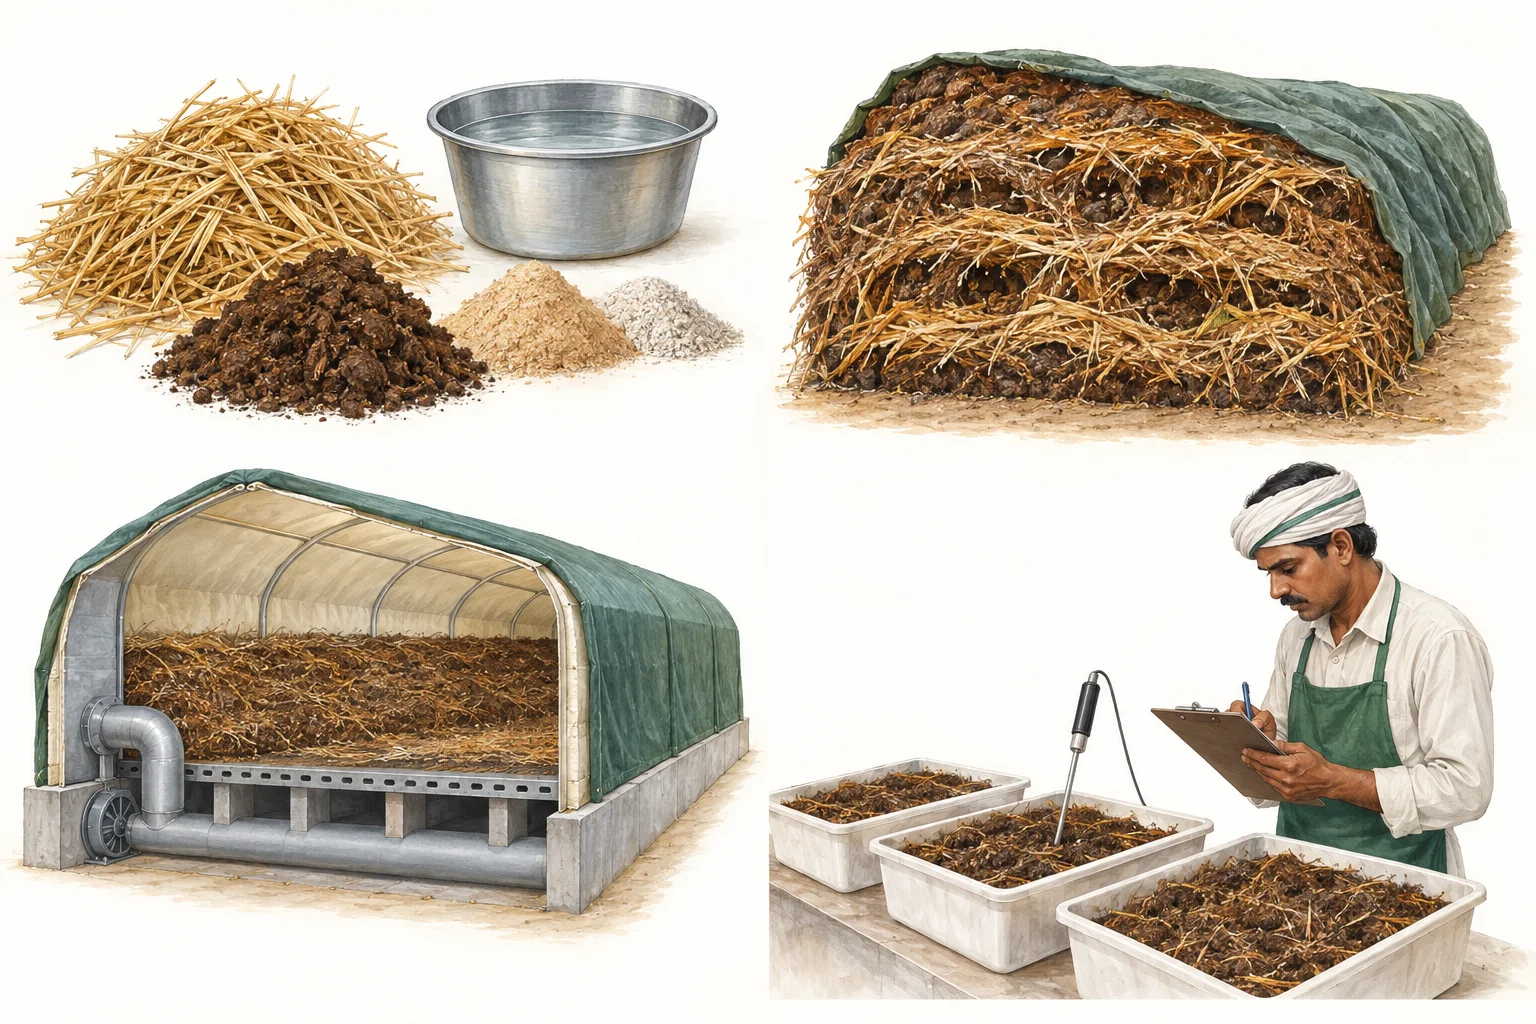
Understand the tunnel
- Notice
- Air must pass through the loaded material.
- Understand
- Pasteurisation, conditioning and cooling have distinct purposes.
- Try it
- Use the validated process and release criteria, not an odour test.
01The four stages in order
Filling and levelling comes first. The blower runs until compost, plenum and the air above sit at roughly one temperature, around 45 to 48 degrees Celsius, which takes about four to five hours.
Then pre pasteurisation conditioning holds the mass between 45 and 52 degrees for two days. Pasteurisation follows at 58 to 59 degrees for 4 to 6 hours. Last comes post pasteurisation conditioning at 45 to 48 degrees for 3 to 4 days, until ammonia is no longer detectable. Smaller tunnels often need 4 to 5 days to reach the same point.
02Filling the tunnel
DMR fills a bulk chamber to a height of 2 to 2.2 metres, loaded so one square metre of tunnel floor carries about 900 to 1000 kg of compost. An even fill at that loading is what lets one blower serve the whole mass.
A deeper fill on the same floor raises resistance and the bottom compacts under its own weight. A shallow patch becomes the easy path for air. Level the surface by hand after the loader has finished, and check the height at several points rather than one.
03Rates, not only setpoints
How fast you move between stages matters as much as where you stop. DMR narrows the dampers and lets the compost heat itself at roughly 1 degree Celsius per hour, reaching 58 to 59 degrees in about 10 to 12 hours. After the hold, temperature is brought down at about 1.5 degrees per hour into the conditioning band.
Throughout, the difference between air above the compost, the compost and the plenum should not exceed 3 degrees. A fast jump or a sudden drop shows the air is working on one part of the mass only.
04Release boundaries
Compost leaves Phase II on evidence, not on the calendar. DMR describes finished compost as dark brown and sweet smelling, holding 64 to 66 per cent moisture with no liquid oozing on a firm squeeze, and carrying free ammonia below 10 ppm.
Temperature is then brought down gradually to 25 to 30 degrees Celsius before spawning. Expect a further 20 to 25 per cent weight loss across Phase II. If ammonia is still detectable, conditioning continues; spawning into ammonia kills young mycelium and invites moulds that live on the amines left behind.
Write the run sheet before filling
- Draw the four stages with the target band for each.
- Note the fill height and kilograms per square metre loaded.
- Log compost, air and plenum temperature every two hours.
- Start the hold clock when the coldest probe reaches 58 degrees.
- Release only after ammonia, moisture and temperature checks pass.
Write in your farm diary: Fill height and loading, two hourly temperatures at each probe, hold start and end, ammonia checks, release decision.
Mistakes that cost a crop
- Starting the hold clock on the air reading rather than the coldest compost probe.
- Ending conditioning by the calendar while ammonia can still be smelled.
- Filling deeper than the tunnel was designed for, which starves the bottom of air.
Check yourself
Three questions, instant answersThe correct order in Phase II is:
DMR fills a bulk tunnel to about:
Ammonia is faintly detectable on day three of conditioning:
An editorial self-check, not a certificate. Answers are not stored, not even on this device.
Words used in this lesson
- Phase II
- The indoor stage that pasteurises compost and then conditions it free of ammonia.
- Levelling off
- Running the blower until compost, plenum and air sit at nearly one temperature.
- Release condition
- A measurement that must pass before a batch leaves the tunnel.
References & further reading
A lesson cannot replace batch measurements or plant-specific procedures.
Open current reference