


A practical guide to growing mushrooms in IndiaA joint educational initiative by MushroomWale & DMR Solan ↗
MushroomFarming.in

A joint educational initiative by

MushroomWale.com
ICAR–Directorate of Mushroom Research, Solan logoICAR–DMRSolan

MushroomFarming / article

Oyster mushroom harvest

Choose maturity and handling around cluster quality, customer format and the immediate post-harvest path. Evidence, method and India-context boundaries remain visible.

Practical explanation + detailed referenceSources & review ↓
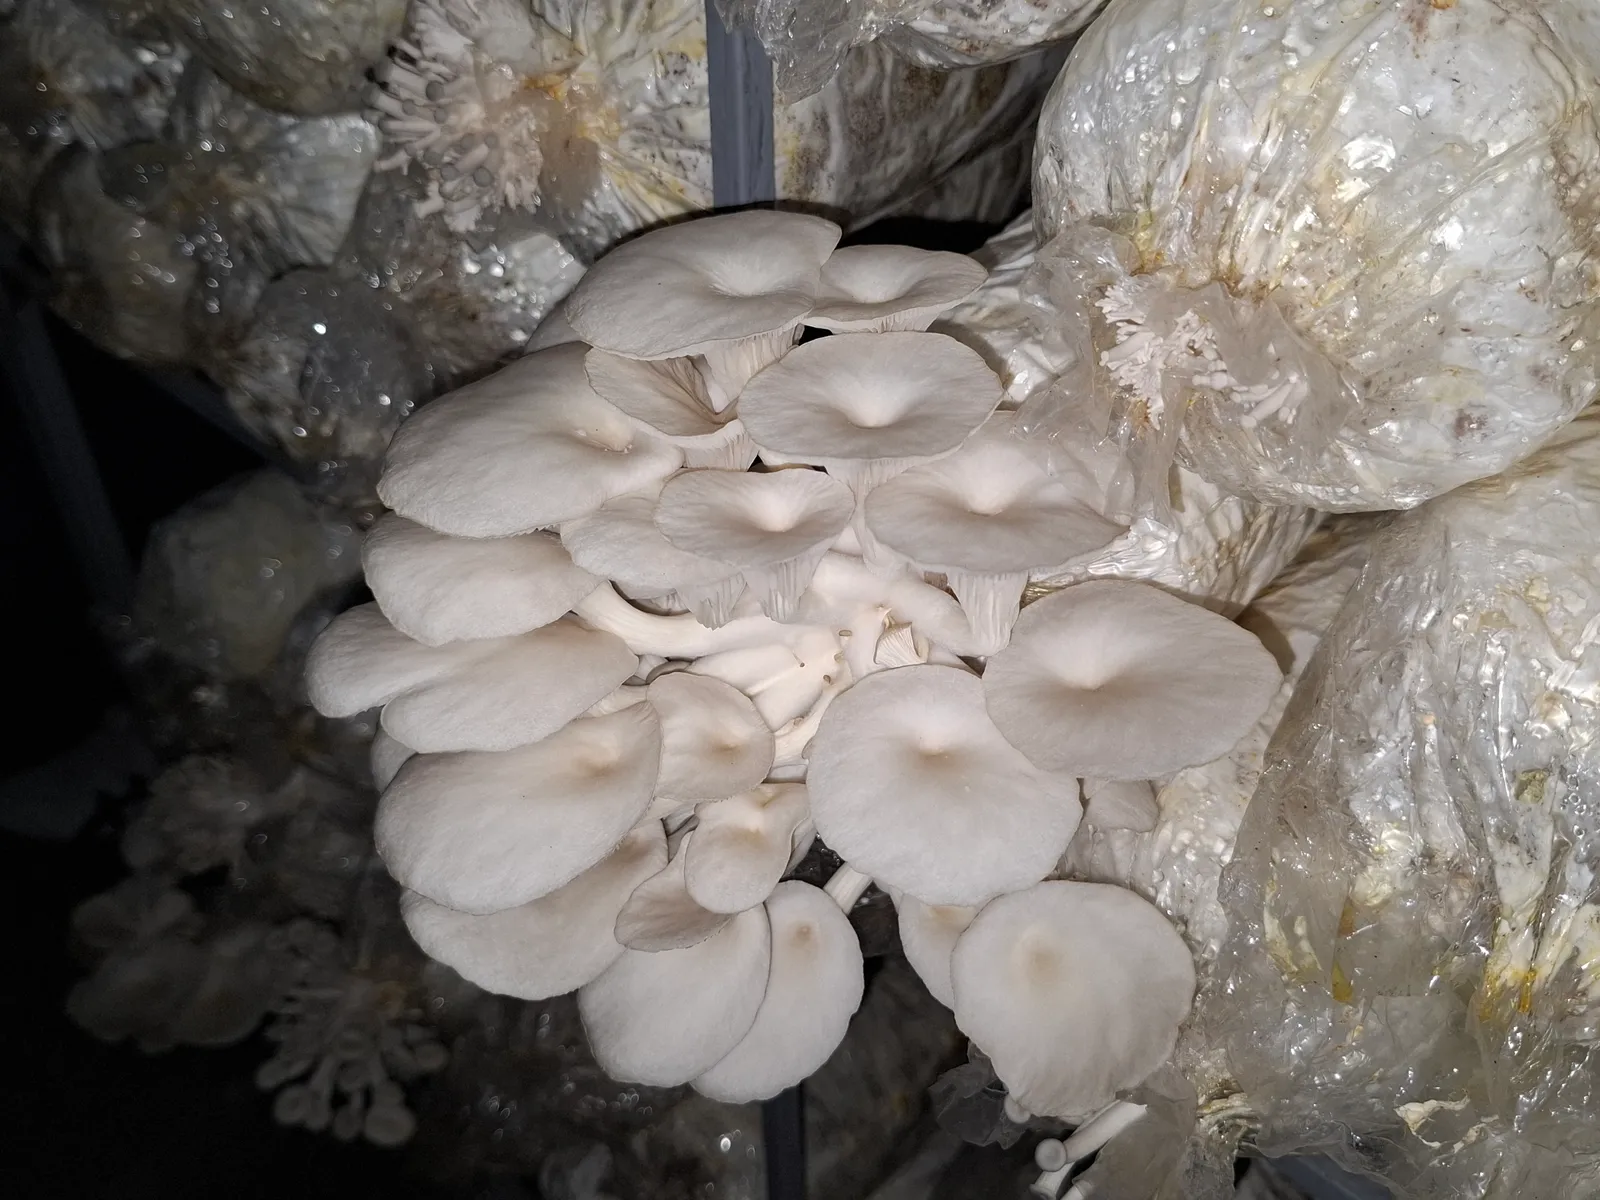
A full white oyster mushroom cluster fruiting from a polythene substrate bag on a rack, Bicol, Philippines.
Real cultivation photograph. Read its source for location and context; it is not a universal operating specification.MarvinBikolano · CC BY-SA 4.0View full photograph ↗
On this pageChoose a section, or keep reading below

Read this in the full guide: Understand the whole Oyster mushroom bag cycle →

Understand the topic

What you need to know.

This page answers when an oyster cluster is ready to pick and how to pick it well: the cap-edge signs, why you pick before spraying, why a bag is cleared in one go, how to trim the stalk, how the flushes follow each other, and how to protect the people who pick from oyster spores. What happens after the mushrooms leave the room, cooling, packing and drying, is on the post-harvest page.

Teaching revised 2026-09-24. Source-linked editorial synthesis; this date does not imply independent technical review.

Part 01

Read the cap edge to know when a cluster is ready

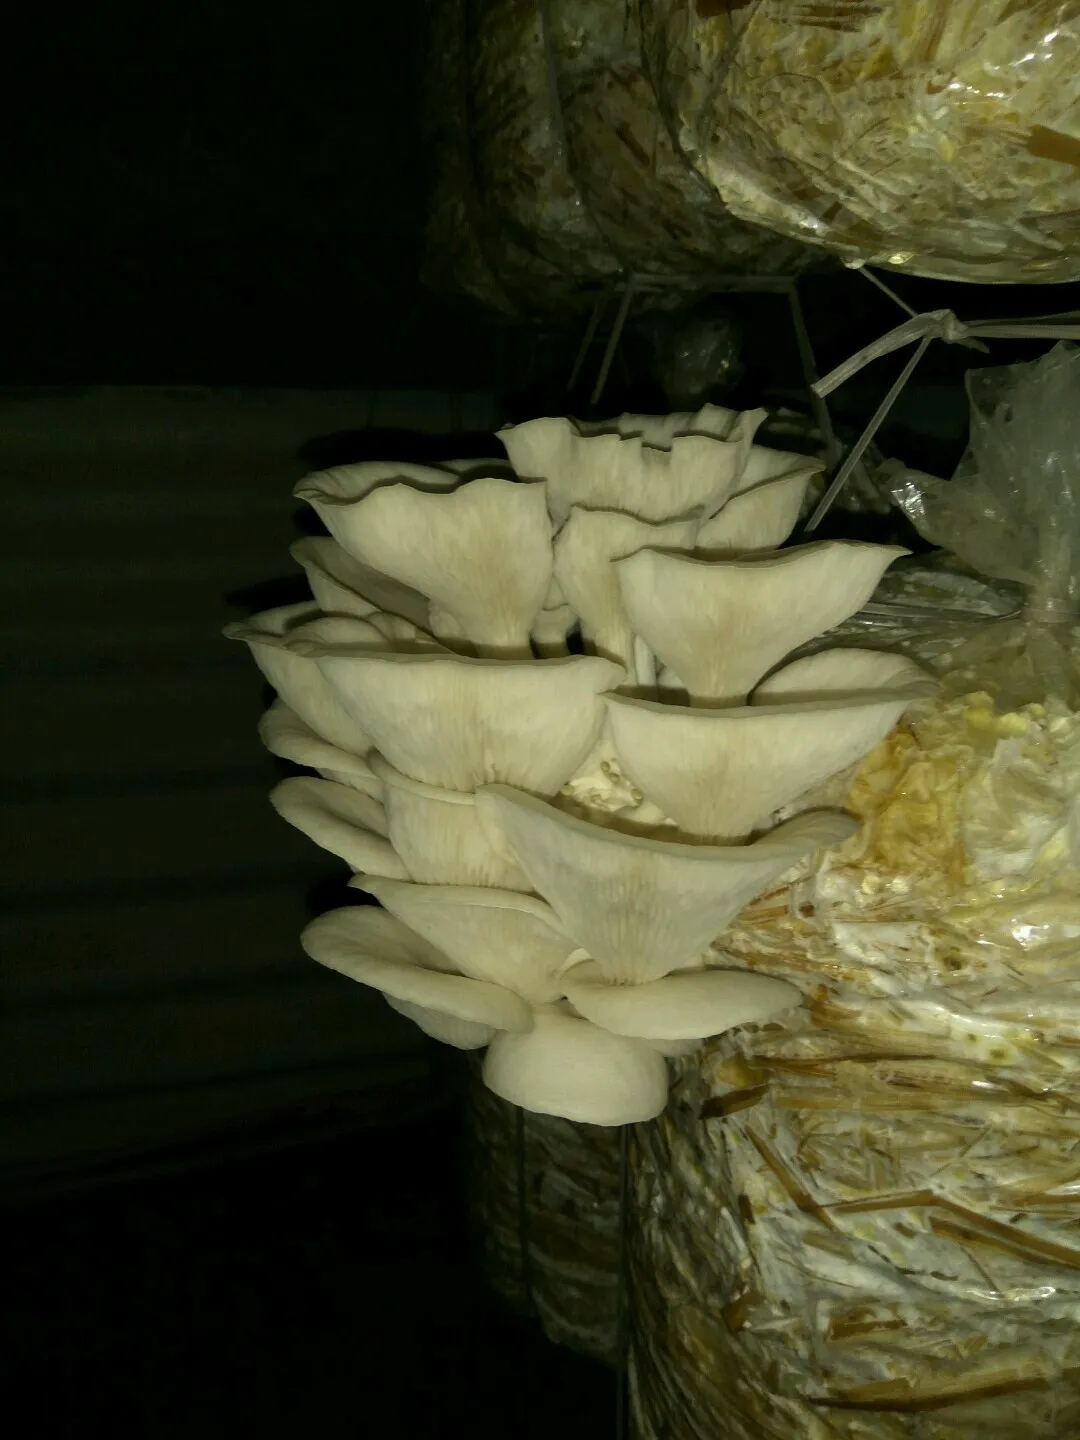
The manual judges the right stage for picking by the shape and size of the fruit body, and the cap edge is where the change shows. In a young mushroom the edge of the cap is thick and its margin is rolled under. In a mature one the cap has gone flat and the edge has started to curl inward.

The ICAR-DMR oyster folder describes the same moment in its own words: pick when the mushroom is fully mature, and it is fit to pick once the outer edges of the cap begin to turn upward.

Pick at the stage your buyer wants, and pick at that stage every time. The manual's list of what buyers look for in oyster is medium-sized, uniform, unwrinkled fresh mushrooms, a short stalk with a large, fleshy cap, white or natural colour, and no insect damage.

Sources: ICAR-DMR manual, 2011 · ICAR-DMR oyster folder

A grey-white oyster mushroom cluster growing from a hanging straw bag at Tamil Nadu Agricultural University, Coimbatore; only 1080x1440 px. NOTE: only 1080x1440 px (below 1600 px long edge).
A grey-white oyster cluster on a hanging straw bag. Many caps have opened out flat and their edges have begun to turn up, the sign the oyster folder uses for picking. Photo: Ramyaguna8.3, CC BY-SA 4.0. Source
Part 02

Picking morning, in order

The order matters as much as the stage. Air the room before you go in, pick before you spray, and clear each ready bag in one go.

  1. Air the room firstFruiting oyster releases spores in huge numbers; the folder says they can be seen like smoke in the room in the morning, and they can cause allergy in the people working there. Open the windows and doors two hours before going in, as the folder and the ICAR-DMR FAQ advise.
  2. Cover your noseEnter with a mask, or at least a cloth over the nose.
  3. Pick before you sprayHarvest before the day's water spray, never after it. The manual and the folder both say so.
  4. Clear the whole bagTake all the mushrooms from a bag at one time. The manual says this lets the next flush start early.
  5. Trim with a knifeCut off the lower part of the stalk, with the straw stuck to it. Keep the stalk short: the manual notes it is hard and many consumers do not like it.
  6. Handle gentlyAvoid rough handling from the first touch; the manual warns against it for oyster.

Sources: ICAR-DMR oyster folder · ICAR Directorate of Mushroom Research: Oyster mushroom cultivation FAQ · ICAR-DMR manual, 2011

Part 03

Signs on the cluster: still young, or ready to pick

Check these on each bag before picking starts.

  • Still young: the cap edge is thick and rolled under. Leave the cluster for now.
  • Ready: the cap is flat and the edge has begun to curl. The manual describes the curl as inward; the folder says the outer edge turns upward.
  • Stalk: buyers want it short, so plan to trim it back as you pick.
  • Water sitting on the caps: the room was sprayed before picking. Move the spray to after the harvest from tomorrow.
  • Insect damage: the manual's buyers want none, so keep damaged mushrooms apart from the good ones.

Sources: ICAR-DMR manual, 2011 · ICAR-DMR oyster folder

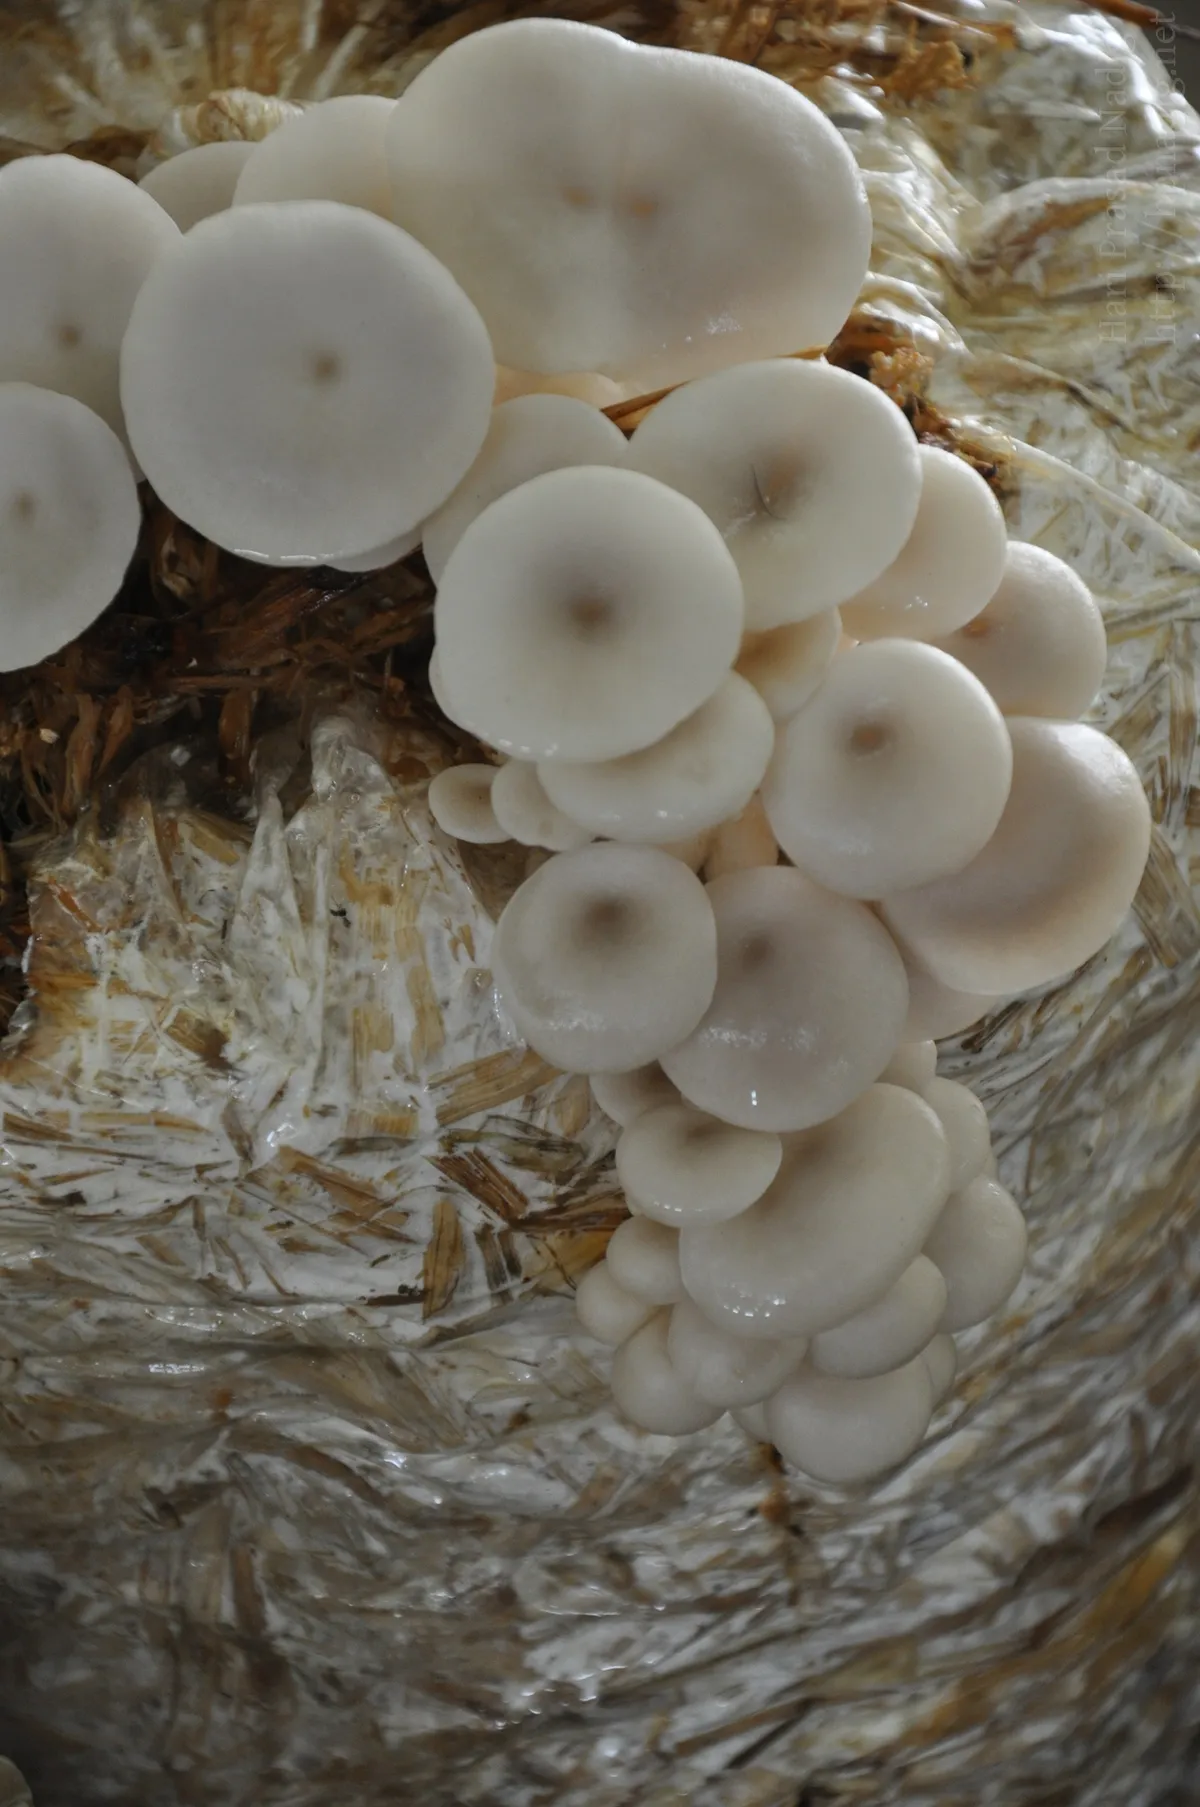
White oyster mushrooms fruiting from a paddy-straw bag, displayed at an organic food mela in Bangalore, Karnataka (2010).
Oyster mushrooms on a straw bag displayed at a mela. Their caps are still round, with smooth edges curving downward. Photo: Hari Prasad Nadig from Bangalore, India, CC BY-SA 2.0. Source
Part 04

Flushes: what follows the first pick

A flush is one wave of mushrooms from the bags. These figures describe the rhythm ICAR-DMR reports. Your own dates will shift with species and weather, so record them.

Gap to the second flush8 to 10 daysAfter the first flush. Oyster folder.
Share of the first flushabout half or moreOf the bag's total crop. Oyster folder.
Flushes worth keepingthreeAfter the third, the folder sends the bags to a deep pit to become manure.
Length of one crop45 to 60 daysManual and the oyster folder's introduction. The folder's economics section says 40 to 50 days.
Bags opened each day20 to 30In the manual's four-room example, so that picking and selling are spread out.

Sources: ICAR-DMR oyster folder · ICAR-DMR manual, 2011

One bag from opening to the pit

  1. OpenThe bag is white through and the polythene comes off.
  2. First flushPinheads about a week later; pick when the cap edge turns.
  3. Second flushAbout 8 to 10 days after the first.
  4. Third flush, then outAfter the third flush the bags go to a deep pit.
Part 05

Harvest mistakes that cost quality or the next flush

Common mistakeSpraying the room and then picking.

Do this insteadPick first; the spray comes after the harvest.

Common mistakePicking only the biggest clusters and leaving the rest on the bag.

Do this insteadClear the bag at one time so the next flush starts early.

Common mistakeSelling with long stalks and straw still attached.

Do this insteadCut the stalk base and its straw off with a knife and keep the stalk short.

Common mistakeWalking into the room at dawn with the windows shut.

Do this insteadOpen the windows and doors two hours before, and wear a mask or a cloth over the nose.

Common mistakeOpening every bag on the same day.

Do this insteadOpen bags in daily batches, as the manual's example does, so there is a steady amount to pick and sell each day.

Common mistakeKeeping spent bags in the room after the third flush.

Do this insteadTake them out to a deep pit, where the folder says they turn into manure for the fields.

Sources: ICAR-DMR manual, 2011 · ICAR-DMR oyster folder

Go deeper

Technical reference, records and tools.

Detailed crop-stage information, parameters, diagrams and specialist tools are kept together below. This material retains its source conditions and review limits.

Open the complete technical reference

oyster · cultivation stage

Oyster mushroom harvest

Choose maturity and handling around cluster quality, customer format and the immediate post-harvest path. Evidence, method and India-context boundaries remain visible.

Publication
Public editorial page
Evidence records
5
External review
Not yet recorded
Wild ID
Not provided
White oyster mushrooms fruiting from a paddy-straw bag, displayed at an organic food mela in Bangalore, Karnataka (2010).
Oyster mushrooms on a straw bag displayed at a mela. Photo: Hari Prasad Nadig from Bangalore, India, CC BY-SA 2.0. Source

The oyster bag method in six steps

Source: ICAR-DMR oyster folder and the 2011 manual.

  1. Chop the strawWheat or paddy straw cut to 2 to 3 cm (manual method uses 5 to 10 cm).Day 0
  2. Hot-water treatmentFolder: 60 to 65 °C for 20 to 30 minutes (manual: 65 to 70 °C for one hour), then drain off the excess water.Day 0
  3. Spawn and fill bags2 to 3 percent spawn on wet-straw weight, in layers; 10 to 12 holes per bag (manual: 10 to 15).Day 0
  4. Spawn run22 to 26 °C in the dark for 15 to 25 days until the bag is white through.Days 1 to 25
  5. Open the bag and fruitLight, fresh air, 75 to 85 percent humidity, CO₂ below 600 ppm (folder: 800 ppm). Pins in about a week.From day 16
  6. Harvest and next flushNext flush 8 to 10 days later. Manual: 500 to 700 kg from one tonne of dry straw in 45 to 60 days.Up to day 60

Quick orientation

Choose maturity and handling around cluster quality, customer format and the immediate post-harvest path. This topic belongs to a Pleurotus substrate-bag or validated block system. The species or strain, substrate treatment and fruiting-air context must travel together.

01

Species identity and spore exposure

‘Oyster’ is a Pleurotus group, not one climate programme. ICAR-DMR distinguishes warm-weather P. flabellatus, P. sajor-caju and P. djamor (20–28°C) from lower-temperature P. florida, P. ostreatus, P. eryngii and P. cornucopiae (12–20°C). Record the species and strain before selecting a range.

02

Why this stage matters

Choose maturity and handling around cluster quality, customer format and the immediate post-harvest path.

03

Method boundary

This topic belongs to a Pleurotus substrate-bag or validated block system. The species or strain, substrate treatment and fruiting-air context must travel together.

  • Confirm the culture as Pleurotus spp., with strain or variety recorded where available.
  • Confirm one method: straw bag or validated lignocellulosic bag or block.
  • Record substrate source, treatment class, batch and contamination observations.
04

Observe and record

Use batch records, stage dates, room observations and contamination patterns. Compare the crop with its own prior condition before changing several variables at once.

05

Evidence status

The page publishes process relationships supported by primary institutional sources. Numeric recipes remain absent where source context, strain identity or specialist review is incomplete.

Production method records

One species can require more than one cultivation model.

OYS-STRAW-BAG

Treated straw bag system

Substrate
clean cereal straw with method evidence
Container
perforated or opened cultivation bag
Treatment
Pasteurization-class treatment or another validated method; not interchangeable with sterilization.
Scale context
home trial to commercial batch, with different hygiene and climate responsibilities
  1. Material check
  2. Treatment
  3. Cooling and moisture check
  4. Spawning
  5. Spawn run
  6. Fruiting transition
  7. Cluster harvest

Trace the boundary

Evidence and limitations

institutional · tier AResearch programmes

Current institutional scope for cultivated and specialty mushroom research in India.

Research scope does not by itself establish a farm recommendation, commercial readiness or strain-specific operating range.

Open primary source
technical-bulletin · tier ATechnologies developed by ICAR-DMR

Institutional method history for oyster, milky, paddy straw, shiitake and selected specialty mushrooms.

Method descriptions are context-specific and contain numeric and broad substrate statements that require independent technical review before operational publication.

Open primary source
current-advisory · tier ACurrent crop advisory

Time-stamped Indian seasonal crop context and the need to choose oyster species for conditions.

Chemical directions are excluded from this platform unless a current label and jurisdiction are independently verified.

Open primary source
technical-bulletin · tier AOyster mushroom cultivation FAQ

Indian institutional distinction between warm- and cool-fruiting Pleurotus species, plus an occupational spore-exposure warning.

The species bands are source context, not a strain guarantee. Generic yield, storage and legacy chemical statements are not carried into operational guidance.

Open primary source
technical-bulletin · tier APost-harvest technology of mushrooms

Species-specific post-harvest deterioration patterns and handling context.

Historic shelf-life statements depend on maturity, handling, packaging and storage conditions and are not reproduced as guarantees.

Open primary source

Read the evidence

Sources & review.

Editorial update: 2026-09-03. Independent technical review is not recorded for this entry.

  1. Research programmes ↗

    ICAR Directorate of Mushroom Research

  2. Technologies developed by ICAR-DMR ↗

    ICAR Directorate of Mushroom Research · 2020

  3. Current crop advisory ↗

    ICAR Directorate of Mushroom Research · 2026

  4. Oyster mushroom cultivation FAQ ↗

    ICAR Directorate of Mushroom Research

  5. Post-harvest technology of mushrooms ↗

    ICAR Directorate of Mushroom Research

Reading a source is not the same as applying its instructions to every farm. Confirm species, strain, crop stage, system, region and publication date. Old chemical recommendations are not current-use instructions.

See something that needs correcting? Tell us →